
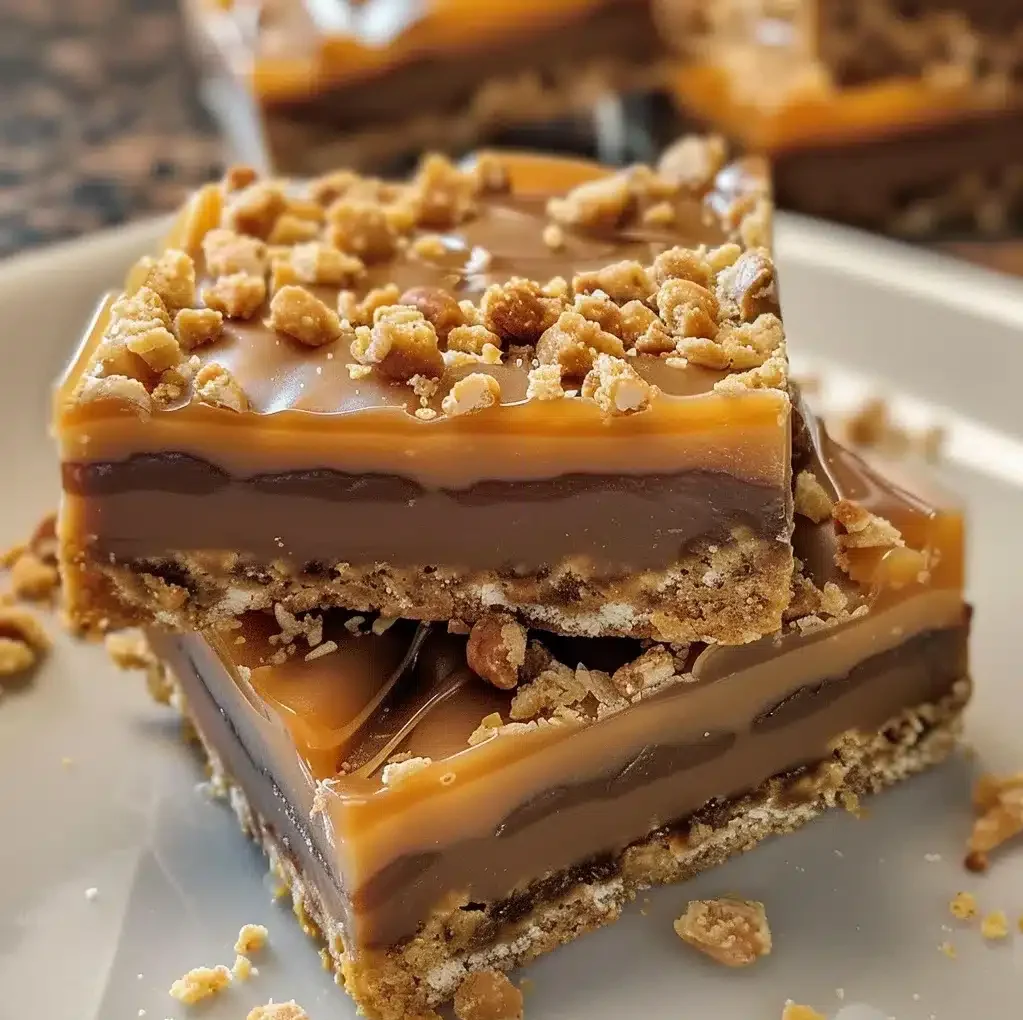
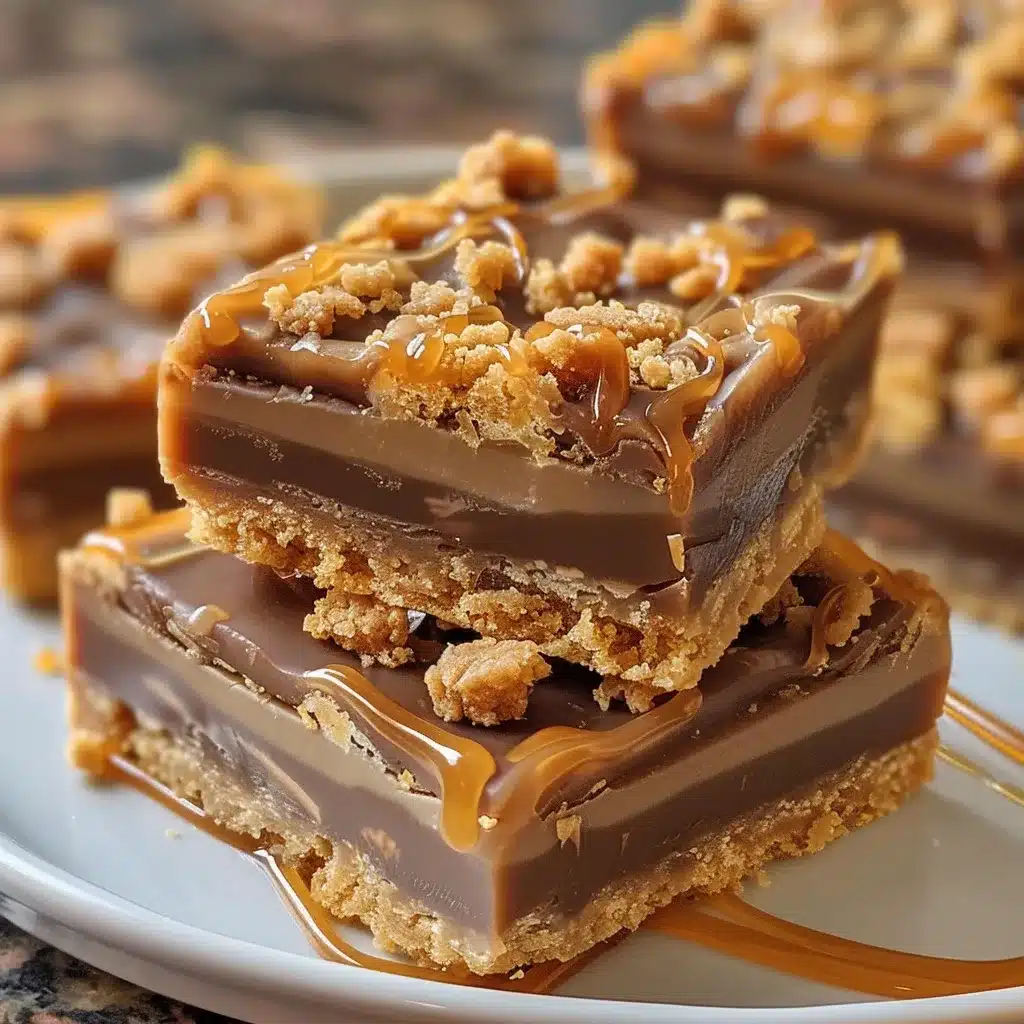
If you’ve been craving a dessert that combines the gooey richness of caramel, the delightful crunch of Butterfinger candy, and the melt-in-your-mouth magic of chocolate, then you’re in for a treat. Butterfinger Caramel Crunch Bars are the ultimate indulgence for anyone who loves sweet, salty, and crunchy all in one bite. These bars are perfect for parties, bake sales, or simply enjoying at home with a cup of coffee. What makes them even better? They’re incredibly easy to prepare, requiring just a handful of ingredients and minimal effort. The result is a dessert that looks impressive, tastes heavenly, and satisfies everyone’s sweet tooth.
Why You’ll Love This Recipe
There’s no shortage of dessert bar recipes out there, so what makes these Butterfinger Caramel Crunch Bars stand out?
- Irresistible Flavor Combination – The creamy caramel pairs beautifully with the crispy peanut-buttery Butterfinger candy pieces and smooth chocolate layer.
- Quick and Easy – You don’t need to be a pro baker to whip these up. With simple steps, this recipe is great for beginners.
- Perfect for Sharing – The bars are made in a large batch, making them perfect for potlucks, family gatherings, or gifting.
- Crowd-Pleaser – Whether you serve them at a party or keep them as a family dessert, these bars are guaranteed to disappear fast.
- Customizable – You can tweak the recipe to fit your flavor preferences with simple variations (more on that later).
If you’re the type who loves chocolate-covered candy bars but also enjoys homemade desserts, this recipe will feel like the best of both worlds.
Ingredients
You don’t need an endless shopping list for this recipe. Just a few pantry staples and, of course, Butterfinger candy bars make it all come together.
Main Ingredients:
- Butterfinger candy bars – Crushed into small chunks for that signature crunch.
- Caramel bits (or wrapped caramels) – For the gooey caramel layer.
- Sweetened condensed milk – Helps create a smooth, rich caramel filling.
- Butter – Adds richness and holds the layers together.
- Semi-sweet or milk chocolate chips – For the luscious chocolate topping.
- Graham cracker crumbs (or digestive biscuits) – Form the crunchy base of the bars.
Tip: For precise measurements and step-by-step details, refer to the recipe card below.
 Directions
 Directions
Follow these simple steps, and you’ll have a batch of Butterfinger Caramel Crunch Bars ready in no time:
- Prepare the crust – Mix graham cracker crumbs with melted butter, then press the mixture into the bottom of a lined baking dish. Bake for a few minutes to set.
- Make the caramel layer – Melt caramel bits with sweetened condensed milk and butter until smooth. Pour over the crust and spread evenly.
- Add Butterfinger pieces – Sprinkle crushed Butterfinger candy bars over the caramel layer while it’s still warm, pressing them in slightly.
- Top with chocolate – Melt chocolate chips (with a touch of butter or shortening for shine) and pour over the Butterfinger-caramel layer. Smooth it out with a spatula.
- Chill and set – Place the bars in the fridge until firm. Once set, cut into squares or rectangles and serve.
These bars taste even better the next day once the flavors have fully melded together.
Servings and Pairing
This recipe typically yields 16–20 bars, depending on how large or small you cut them. They’re rich, so smaller squares are usually enough to satisfy a sweet craving.
Pairing Suggestions:
- Hot beverages – Coffee, cappuccino, or hot cocoa enhances the sweetness.
- Cold milk – A classic pairing that balances the richness.
- Dessert platters – Pair with brownies, blondies, or chocolate chip cookies for variety.
They’re versatile enough to serve at casual gatherings, holiday parties, or as a sweet after-dinner treat.
Variations
One of the best parts about this recipe is its adaptability. You can switch up the flavors and textures to create new versions:
- Peanut Butter Lovers – Spread a thin layer of creamy peanut butter over the crust before adding the caramel.
- Nutty Crunch – Add chopped peanuts, almonds, or cashews for extra crunch.
- Dark Chocolate Twist – Swap milk chocolate chips for dark chocolate to balance the sweetness.
- Holiday Special – Drizzle white chocolate on top and sprinkle with festive sprinkles for seasonal celebrations.
- Cookie Crust – Replace graham crackers with crushed Oreos or shortbread cookies for a different base flavor.
Experiment with these variations to keep things exciting every time you make them.
Storage/Reheating
Storing these bars properly ensures they stay fresh and delicious:
- Room Temperature – Keep in an airtight container for up to 3 days.
- Refrigerator – Store for up to 1 week for maximum freshness.
- Freezer – Wrap bars individually in parchment paper and freeze in a sealed container for up to 2 months. Thaw at room temperature before serving.
Since these bars don’t require reheating, you just need to let them come to room temperature for the best texture if stored in the fridge or freezer.
FAQs
Can I make these ahead of time?
Yes! These bars are perfect for making a day or two in advance since the flavors get even better as they set.
Do I need to refrigerate them?
Refrigeration isn’t required if you’ll eat them within a few days, but it helps them last longer and keeps the chocolate firm.
Can I use fun-sized Butterfinger bars?
Absolutely! Fun-sized or mini Butterfinger bars work just as well—just chop them into small pieces.
What if I don’t have caramel bits?
You can use wrapped caramels or even make homemade caramel sauce as a substitute.
How do I cut them neatly?
Use a sharp knife dipped in hot water, then wiped dry, before slicing. This helps get clean, smooth cuts without cracking the chocolate.
Conclusion
Butterfinger Caramel Crunch Bars are the perfect balance of gooey, crunchy, and chocolaty goodness. With their simple ingredients, easy steps, and rich flavors, they’re bound to become a family favorite. Whether you make them for a holiday dessert tray, a bake sale, or just because you’re craving something sweet, these bars won’t disappoint. Try out different variations, pair them with your favorite drink, and share them with friends and family—you’ll be asked for the recipe again and again.
Print
Butterfinger Caramel Crunch Bars
- Total Time: 30 minutes
- Yield: 20 bars
- Diet: Vegetarian
Description
Indulge in rich, gooey, and crunchy Butterfinger Caramel Crunch Bars made with chocolate, caramel, and Butterfinger candy pieces. The perfect dessert for parties, holidays, or anytime cravings hit!
Ingredients
- 2 cups graham cracker crumbs (or digestive biscuits, crushed)
- 1/2 cup unsalted butter, melted
- 1 (14 oz) can sweetened condensed milk
- 1 (11 oz) bag caramel bits (or wrapped caramels, unwrapped)
- 2 tbsp unsalted butter (for caramel)
- 2 cups semi-sweet or milk chocolate chips
- 8–10 fun-sized Butterfinger candy bars, crushed
Instructions
- Preheat oven to 350°F (175°C) and line a 9×13-inch baking dish with parchment paper.
- In a medium bowl, mix graham cracker crumbs with 1/2 cup melted butter. Press firmly into the bottom of the baking dish to form a crust. Bake for 8–10 minutes.
- In a saucepan, melt caramel bits with sweetened condensed milk and 2 tbsp butter, stirring until smooth. Pour over the crust and spread evenly.
- Sprinkle crushed Butterfinger pieces over the caramel layer, gently pressing them in.
- Melt chocolate chips in a microwave-safe bowl in 30-second intervals (stirring each time). Spread melted chocolate evenly over the Butterfinger layer.
- Refrigerate for 1–2 hours until set. Cut into bars and serve.
Notes
- For clean cuts, dip a sharp knife in hot water and wipe dry before slicing.
- Add a pinch of sea salt over the chocolate layer for a salted caramel twist.
- Store leftovers in the fridge for up to 1 week or freeze for up to 2 months.
- Use Oreos or shortbread instead of graham crackers for a flavor variation.
- Prep Time: 20 minutes
- Cook Time: 10 minutes