
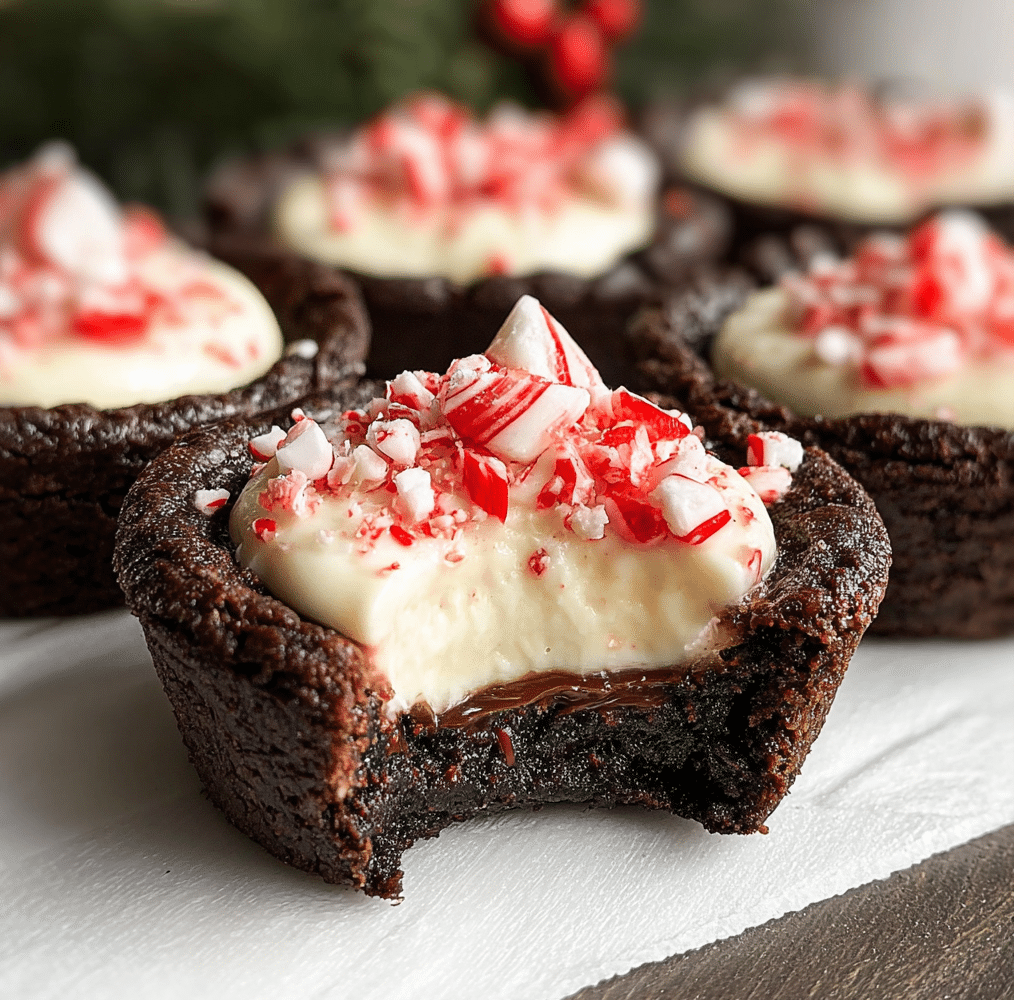
Chocolate Peppermint Cookie Cups are the perfect holiday treat—rich, festive, creamy, and absolutely irresistible. Imagine a soft, chocolatey cookie shell baked into a cup shape and filled with a fluffy peppermint cheesecake mousse. These cookie cups check every box: indulgent chocolate flavor, cool peppermint freshness, and a creamy filling that melts in your mouth. With their adorable bite-sized presentation and holiday flair, they’re ideal for Christmas parties, cookie exchanges, or fun winter baking.
Why You’ll Love This Recipe
- Festive flavor combo: Rich chocolate + cool peppermint = a flawless holiday pairing.
- Creamy no-bake filling: Easy, smooth peppermint cheesecake mousse that requires zero oven time.
- Cute and party-friendly: Mini cookie cups are fun, beautiful, and great for serving.
- Make-ahead friendly: Bake the cups in advance and fill them later—perfect for busy schedules.
- Foolproof method: Simple steps, reliable results, and approachable ingredients.
- Kid-friendly: Fun to decorate and even more fun to eat.
Ingredients You’ll Need
(Tip: You’ll find the full list of ingredients and measurements in the recipe card below.)
Chocolate Cookie Cups
- 2 cups all-purpose flour
- 1/4 cup Dutch-processed cocoa powder, sifted
- 1/4 cup black cocoa powder
- 1 tsp baking soda
- 1/2 tsp salt
- 1 cup unsalted butter, room temperature
- 1/2 cup granulated sugar
- 1 cup packed light brown sugar
- 2 large eggs, room temperature
- 1 tsp vanilla extract
Peppermint Cheesecake Filling
- 1 cup chilled heavy whipping cream
- 8 oz full-fat cream cheese
- 1/2 cup granulated sugar
- 1 tsp peppermint extract
- Red gel food coloring
- Crushed candy canes, for topping
Let’s Get Started
Step 1: Prepare the Cookie Dough
In a medium bowl, whisk together flour, Dutch cocoa, black cocoa, baking soda, and salt.
In a separate large bowl, cream the butter, granulated sugar, and brown sugar until creamy and fluffy.
Beat in eggs one at a time, followed by vanilla extract.
Add the dry ingredients to the wet ingredients and mix just until combined.
The dough will be soft, chocolatey, and ready for shaping.
Step 2: Form the Cookie Cups
Preheat your oven to 350°F (180°C).
Lightly grease a mini muffin tin.
Roll the dough into 1-inch balls and place one in each cavity.
Use a small spoon or the back of a measuring spoon to press an indention into the center.
This helps the cups keep their shape during baking.
Step 3: Bake
Bake for 10–12 minutes, or until the cookies rise, look set, and puff slightly.
Immediately press the centers again while warm to maintain the cup shape.
Let the cookie cups cool completely in the pan before removing.
Step 4: Make the Peppermint Cheesecake Filling
Beat heavy cream until stiff peaks form; set aside.
In another bowl, beat cream cheese with sugar until smooth.
Mix in peppermint extract.
Fold in the whipped cream gently to keep the filling light and airy.
Add a few drops of red gel coloring for a pink peppermint swirl.
Step 5: Fill the Cookie Cups
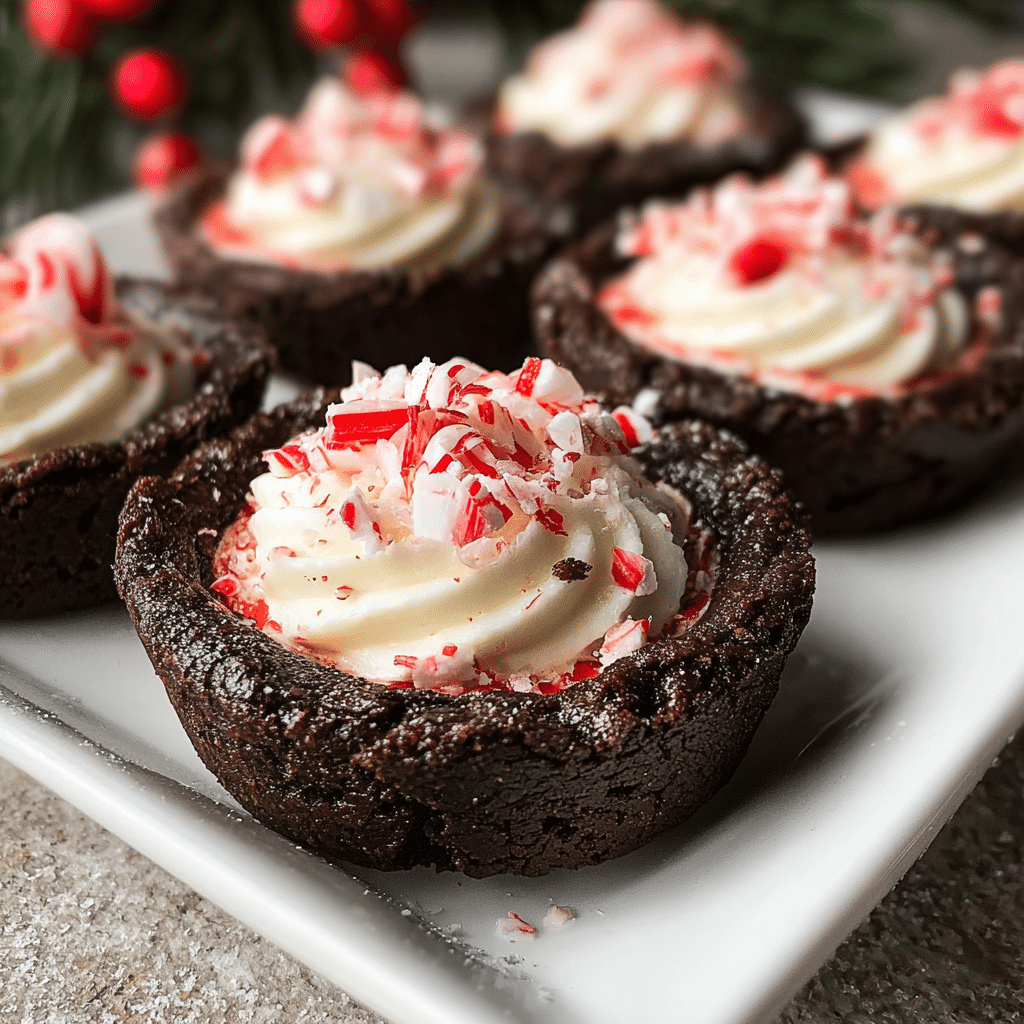
Transfer the peppermint filling to a piping bag and swirl it into each cooled cookie cup.
Top with crushed candy canes for crunch and festive sparkle.
Servings and Pairing
This recipe makes 24–30 cookie cups, depending on your mini muffin pan.
They pair beautifully with:
- Hot chocolate
- Peppermint mocha
- Coffee or espresso
- Vanilla ice cream
- A glass of cold milk
These cookie cups also look stunning on holiday dessert boards or cookie platters.
Variations
Chocolate Ganache Cookie Cups
Add a spoonful of warm ganache inside each cup before filling.
White Chocolate Peppermint Cups
Swap the chocolate dough for vanilla cookie dough and keep the peppermint filling.
Mocha Peppermint Cups
Add 1 teaspoon espresso powder to the cookie dough.
Oreo Peppermint Cups
Replace half the flour with crushed Oreo crumbs for more texture.
Red Velvet Peppermint Cups
Add red food coloring and a little cocoa powder for festive red velvet cookie cups.
Storage Tips
- Refrigerator: Store filled cookie cups in an airtight container for up to 4 days.
- Freezer: Freeze unfilled cookie cups for 2 months. Thaw and fill when ready.
- Do not freeze filled cups—the candy canes will dissolve and the filling may separate.
- Keep cookie cups in a cool place to prevent the peppermint filling from softening too much.
FAQs
Can I make the cookie cups ahead of time?
Yes! Bake the cups up to 3 days ahead or freeze for longer storage.
Can I use regular cocoa instead of black cocoa?
Yes, but the flavor and color will be lighter. A mix of black and Dutch cocoa gives deep flavor.
Can I replace the peppermint extract?
You can use vanilla extract or almond extract, but it won’t have the same holiday flavor.
Why is my filling too soft?
Make sure the whipping cream is cold and whipped to stiff peaks before folding in.
Can I make these gluten-free?
Yes—use a 1:1 gluten-free baking flour blend.
Final Thoughts
Chocolate Peppermint Cookie Cups are a festive, rich, and cheerful holiday dessert that brings the best winter flavors together in one perfect bite. With their fudgy chocolate base and creamy peppermint swirl, they’re a guaranteed hit at Christmas gatherings, cookie exchanges, and family celebrations. Easy to make, fun to decorate, and even more fun to eat—these cookie cups will become a holiday tradition you’ll return to year after year.
Print
Chocolate Peppermint Cookie Cups
- Total Time: 32 minutes
- Yield: 30 cookie cups
- Diet: Vegetarian
Description
Rich chocolate cookie cups filled with a creamy peppermint cheesecake mousse and topped with crushed candy canes. These festive Chocolate Peppermint Cookie Cups are perfect for holiday parties
Ingredients
Chocolate Cookie Cups
- 2 cups all-purpose flour
- 1/4 cup Dutch-processed cocoa powder, sifted
- 1/4 cup black cocoa powder
- 1 tsp baking soda
- 1/2 tsp salt
- 1 cup unsalted butter, room temperature
- 1/2 cup granulated sugar
- 1 cup packed light brown sugar
- 2 large eggs, room temperature
- 1 tsp vanilla extract
Peppermint Cheesecake Filling
- 1 cup chilled heavy whipping cream
- 8 oz full-fat cream cheese
- 1/2 cup granulated sugar
- 1 tsp peppermint extract
- Red gel food coloring
- Crushed candy canes
Instructions
- Preheat oven to 350°F (180°C). Lightly grease a mini muffin pan.
- In a medium bowl, whisk flour, Dutch cocoa, black cocoa, baking soda, and salt.
- In a separate bowl, cream butter, granulated sugar, and brown sugar until fluffy.
- Add eggs one at a time, then mix in vanilla extract.
- Add the dry ingredients to the wet mixture and mix just until combined.
- Roll dough into 1-inch balls and place into the mini muffin pan cavities.
- Press the center gently with a spoon to create an indentation.
- Bake for 10–12 minutes or until the cups appear set.
- While warm, press the centers again to maintain the cup shape. Allow to cool completely.
- Make the filling: Whip the heavy cream to stiff peaks.
- In another bowl, beat cream cheese and sugar until smooth.
- Add peppermint extract and a small amount of red gel coloring.
- Fold in the whipped cream gently to maintain a fluffy texture.
- Pipe the filling into the cooled cookie cups.
- Top with crushed candy canes before serving.
Notes
- Use room temperature butter for creamier cookie dough.
- Don’t overbake the cookie cups—they should be soft, not crunchy.
- For extra chocolate depth, replace 1 tablespoon flour with cocoa powder.
- Chill the filling slightly if it’s too soft before piping.
- Add the candy cane topping just before serving to keep it crisp.
- Store cookie cups unfilled for make-ahead convenience.
- Prep Time: 20 minutes
- Cook Time: 12 minutes