
There’s something irresistibly satisfying about biting into a perfectly crispy chicken cutlet — that golden crust giving way to juicy, tender meat inside. Whether you’re cooking for a weeknight dinner, meal prepping for the week, or impressing guests at a get-together, crispy chicken cutlets are the ultimate crowd-pleaser. Their versatility makes them a staple in kitchens worldwide — from Italian-style cutlets to Japanese katsu and American-style fried chicken sandwiches.
Why You’ll Love This Recipe
You’ll love this crispy chicken cutlet recipe for so many reasons — it’s quick, easy, and incredibly satisfying. But let’s dig into what makes it truly special:
- Crispy Perfection Without Deep Frying:
You don’t need a deep fryer or gallons of oil. A simple shallow fry gives you that perfect golden-brown crust that stays crunchy even after cooling. - Juicy Inside, Crunchy Outside:
The secret to a great cutlet is keeping the chicken moist inside while creating a crunchy exterior. A combination of proper pounding, seasoning, and breading ensures every bite is mouthwateringly delicious. - Quick and Family-Friendly:
You can whip this up in under 30 minutes — perfect for busy weeknights or last-minute guests. - Customizable:
Want it spicy? Add cayenne or chili flakes. Prefer a cheesy crust? Mix some grated Parmesan into your breadcrumbs. The possibilities are endless. - Pairs with Everything:
From mashed potatoes and pasta to salads and sandwiches, these cutlets go with just about anything.
Once you try it, you’ll see why these cutlets have become a staple in homes everywhere. They’re crispy, flavorful, and completely addictive!
Ingredients You’ll Need
(Tip: You’ll find the full list of ingredients and measurements in the recipe card below.)
To achieve that perfect crunch and flavor, here’s what you’ll need:
- Chicken Breasts:
Boneless and skinless chicken breasts are ideal. Slice them in half horizontally to make thin cutlets — this ensures even cooking. - Flour:
Helps the egg wash stick to the chicken and creates the base layer for the crispy coating. - Eggs:
Acts as a binder between the flour and breadcrumbs. - Breadcrumbs:
Use panko breadcrumbs for extra crunch, or regular ones for a classic texture. You can also mix both for balance. - Seasonings:
Salt, black pepper, garlic powder, paprika, and a touch of cayenne for a mild kick. - Oil for Frying:
Vegetable oil, canola, or light olive oil all work great. Just enough to shallow fry. - Optional Add-Ons:
Grated Parmesan cheese, fresh parsley, or lemon zest for extra flavor.
Pro Tip:
If you’re aiming for an even more flavorful coating, season every layer — the chicken, the flour, and the breadcrumbs. That’s the chef’s secret to perfectly seasoned cutlets every single time.
Let’s Get Started (Instructions)
Here’s a step-by-step guide to making crispy chicken cutlets that come out perfect every time:
Prepare the Chicken:
Start by slicing your chicken breasts in half horizontally to create thinner cutlets. Place them between two sheets of plastic wrap or parchment paper and gently pound them with a meat mallet until they’re about ¼-inch thick. This ensures even cooking and tenderness.Season the Chicken:
Sprinkle salt, pepper, garlic powder, and paprika evenly over both sides of the chicken. Set aside.Set Up the Breading Station:
Bowl 1: All-purpose flour seasoned with a pinch of salt and pepper.
Bowl 2: Beaten eggs.
Bowl 3: Breadcrumbs (panko or regular) mixed with seasoning and Parmesan cheese (optional).
Coat the Chicken:
Dip each piece of chicken first into the flour (shake off excess), then into the egg wash, and finally coat it evenly with breadcrumbs. Press the breadcrumbs gently to make sure they adhere well.Heat the Oil:
In a large skillet, heat about ¼ inch of oil over medium-high heat. Test it by dropping a breadcrumb — if it sizzles immediately, it’s ready.Fry the Cutlets:
Place the chicken in the hot oil without overcrowding the pan. Cook for about 3–4 minutes per side or until golden brown and crispy. Transfer to a paper towel–lined plate to drain excess oil.Serve and Enjoy:
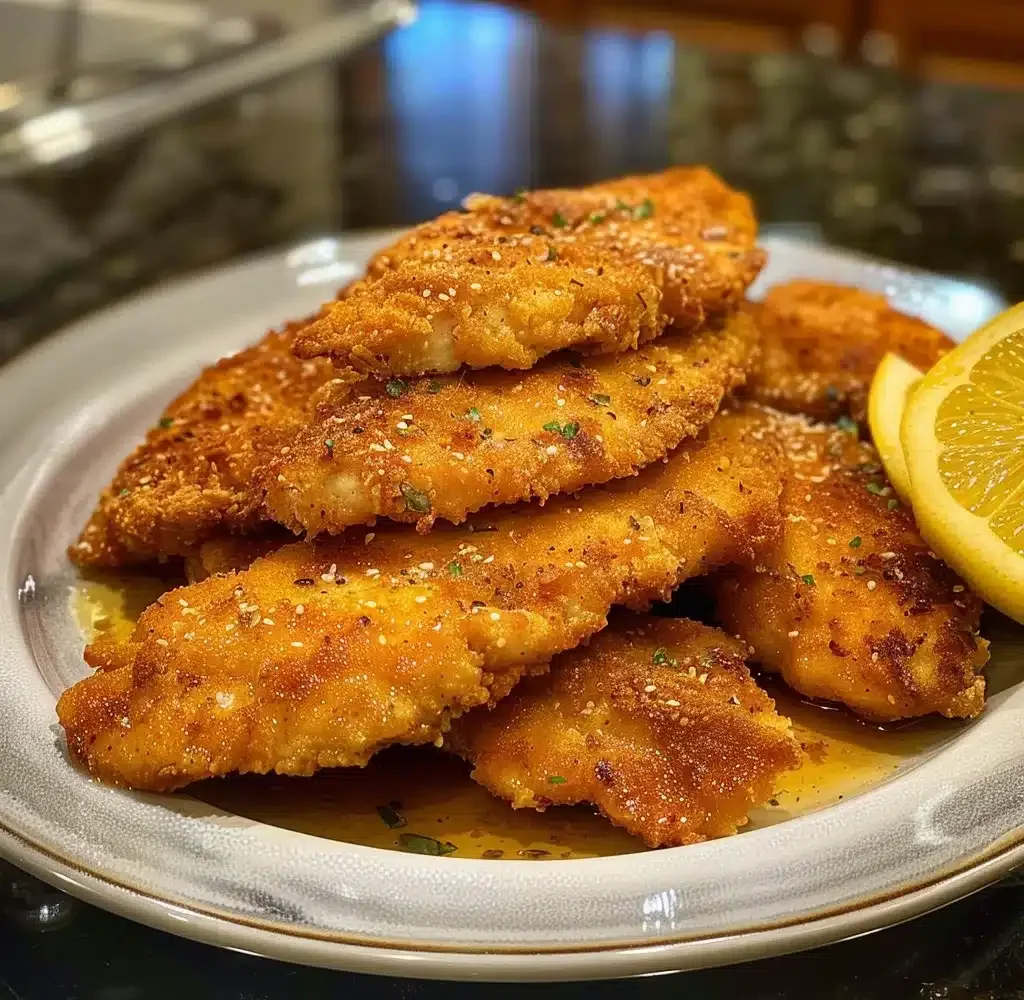
Serve hot with lemon wedges, salad, or your favorite dipping sauce.
Pro Tip:
Keep the cooked cutlets warm in a 200°F (93°C) oven while frying the rest — this keeps them crispy until serving.
Servings and Pairing
This recipe serves 4 people generously, but you can easily scale it up or down depending on your needs. The beauty of crispy chicken cutlets is how versatile they are when it comes to pairing.
Here are some delicious serving ideas:
- Classic Style: Serve with mashed potatoes, green beans, or a simple arugula salad.
- Italian Twist: Pair with spaghetti marinara and top with shredded Parmesan.
- Asian Fusion: Serve with jasmine rice and a side of soy dipping sauce.
- Sandwich Style: Stack inside a brioche bun with lettuce, tomato, and mayo for the ultimate chicken sandwich.
No matter how you serve them, these cutlets always deliver a satisfying crunch and rich flavor that everyone will crave.
Variations
Crispy chicken cutlets are like a blank canvas for your culinary creativity. Here are a few ways to make them your own:
- Spicy Cutlets: Add cayenne pepper, chili flakes, or hot sauce to the egg mixture for a kick.
- Cheesy Version: Mix grated Parmesan or mozzarella into the breadcrumbs for a rich, savory flavor.
- Herb-Infused: Add dried oregano, basil, or thyme to the breadcrumb mix for an aromatic touch.
- Gluten-Free Option: Use almond flour and gluten-free breadcrumbs instead of regular ones.
- Baked Version: For a lighter option, bake at 400°F (200°C) for 20–25 minutes, flipping halfway through for even crispiness.
These small tweaks let you reinvent this dish every time you make it!
Storage Tips
Got leftovers? Don’t worry — crispy chicken cutlets store and reheat beautifully when done right.
- In the Refrigerator:
Store cooled cutlets in an airtight container for up to 3 days. Reheat in an oven or air fryer at 350°F (175°C) for 5–7 minutes to restore the crispiness. - In the Freezer:
Freeze cooked cutlets in a single layer on a baking sheet. Once frozen, transfer them to a freezer-safe bag for up to 2 months. Reheat directly from frozen for best results. - Avoid the Microwave:
It softens the crust, so always use the oven or skillet for reheating.
FAQs
1. Can I use chicken thighs instead of breasts?
Yes, boneless thighs work perfectly and add extra juiciness to the cutlets.
2. How do I make them extra crispy?
Use panko breadcrumbs, don’t overcrowd the pan, and make sure the oil is hot enough before frying.
3. Can I make this recipe ahead of time?
Absolutely! Bread the cutlets ahead and refrigerate for up to 24 hours before frying.
4. What’s the best oil for frying?
Use neutral oils like canola, vegetable, or peanut oil for best results.
5. Can I bake instead of fry?
Yes! Brush lightly with oil and bake at 400°F (200°C) for about 20 minutes, flipping halfway.
Final Thoughts
Crispy chicken cutlets are proof that simple ingredients can create extraordinary flavor. With their golden crust, tender center, and endless pairing options, this dish is bound to become a household favorite. Whether you’re serving them for dinner, lunch, or a casual get-together, these cutlets bring restaurant-quality crunch right to your kitchen. So go ahead, make a batch — because one bite, and you’ll understand why crispy chicken cutlets never go out of style.
Print
Crispy Chicken Cutlets
- Total Time: 30 minutes
- Yield: 4 servings
Description
Golden, crispy chicken cutlets with a juicy center and perfect crunch! Easy, flavorful, and ready in under 30 minutes. Perfect for dinners, sandwiches, or meal prep.
Ingredients
- 2 boneless, skinless chicken breasts (sliced into thin cutlets)
- ½ cup all-purpose flour
- 2 large eggs (beaten)
- 1 cup breadcrumbs (panko or regular)
- ½ tsp salt
- ½ tsp black pepper
- 1 tsp garlic powder
- ½ tsp paprika
- ¼ tsp cayenne pepper (optional)
- 2 tbsp grated Parmesan cheese (optional)
- ½ cup oil (vegetable, canola, or light olive oil for frying)
- Lemon wedges (for serving)
Instructions
Prepare Chicken: Slice chicken breasts horizontally to create thin cutlets. Pound gently to even thickness.
Season: Sprinkle both sides with salt, pepper, garlic powder, and paprika.
Set Up Breading Station:
Bowl 1: Flour
Bowl 2: Beaten eggs
Bowl 3: Breadcrumbs mixed with Parmesan and seasonings
Coat Chicken: Dredge each piece in flour, dip in egg, then coat evenly in breadcrumbs. Press firmly so crumbs stick.
Heat Oil: In a large skillet, heat oil over medium-high until hot (a breadcrumb should sizzle immediately).
Fry Cutlets: Cook each cutlet 3–4 minutes per side until golden brown and cooked through.
Drain and Serve: Transfer to paper towels, squeeze lemon juice over top, and serve hot with sides or salad.
Notes
- For Extra Crispiness: Use panko breadcrumbs and make sure oil is hot before frying.
- Even Cooking: Pound chicken evenly to avoid thick or undercooked spots.
- Healthier Option: Bake at 400°F (200°C) for 20–25 minutes instead of frying.
- Flavor Boost: Add fresh herbs or Parmesan to the breadcrumb mix.
- Reheating Tip: Use an oven or air fryer to re-crisp — avoid microwaving.
- Prep Time: 10 minutes
- Cook Time: 20 minutes