
If you’re looking for a fun, festive, and downright magical treat for Halloween, you can’t go wrong with Hocus Pocus Marshmallow Pops. Inspired by the cult-classic Halloween movie Hocus Pocus, these whimsical marshmallow pops are colorful, easy to make, and a hit with kids and adults alike. With their playful design and sweet taste, they’re perfect for Halloween parties, school events, or even a cozy movie night at home with popcorn and spooky snacks.
Whether you’re celebrating with a full Halloween spread or just want a festive snack to enjoy while rewatching Hocus Pocus, these marshmallow pops are sure to cast a sweet spell on everyone who tries them.
Why You’ll Love This Recipe
There are plenty of Halloween treats to choose from, but these Hocus Pocus Marshmallow Pops stand out for so many reasons:
- Easy to make – No baking, no fuss, just melt, dip, and decorate.
- Kid-friendly – A great activity for children to help with, from dipping marshmallows to sprinkling decorations.
- Festive and fun – Inspired by the Sanderson sisters, these pops add a magical touch to any Halloween celebration.
- Customizable – Change up the colors, sprinkles, or toppings to match your party theme.
- Portable treat – Perfect for Halloween goody bags, dessert tables, or as edible party favors.
If you’re short on time but still want to impress with a themed dessert, these pops are your new go-to.
Ingredients
Tip: You’ll find the full list of ingredients and measurements in the recipe card below.
- Large marshmallows – The base of the pops.
- Candy melts or colored chocolate (orange, purple, green, and black for Halloween vibes).
- Lollipop sticks or paper straws – To hold the pops.
- Sprinkles, candy eyes, or edible glitter – For decoration.
- Shortening or coconut oil – Helps thin the candy melts if needed.
Optional: Drizzle with white chocolate for a spooky cobweb effect.
Directions
Making these marshmallow pops is simple and fun. Here’s how:
Prepare marshmallows – Insert a lollipop stick into each marshmallow and set aside.
Melt candy coating – In separate bowls, melt the candy melts in the microwave in 30-second intervals, stirring until smooth. Add a small amount of shortening or coconut oil if the mixture is too thick.
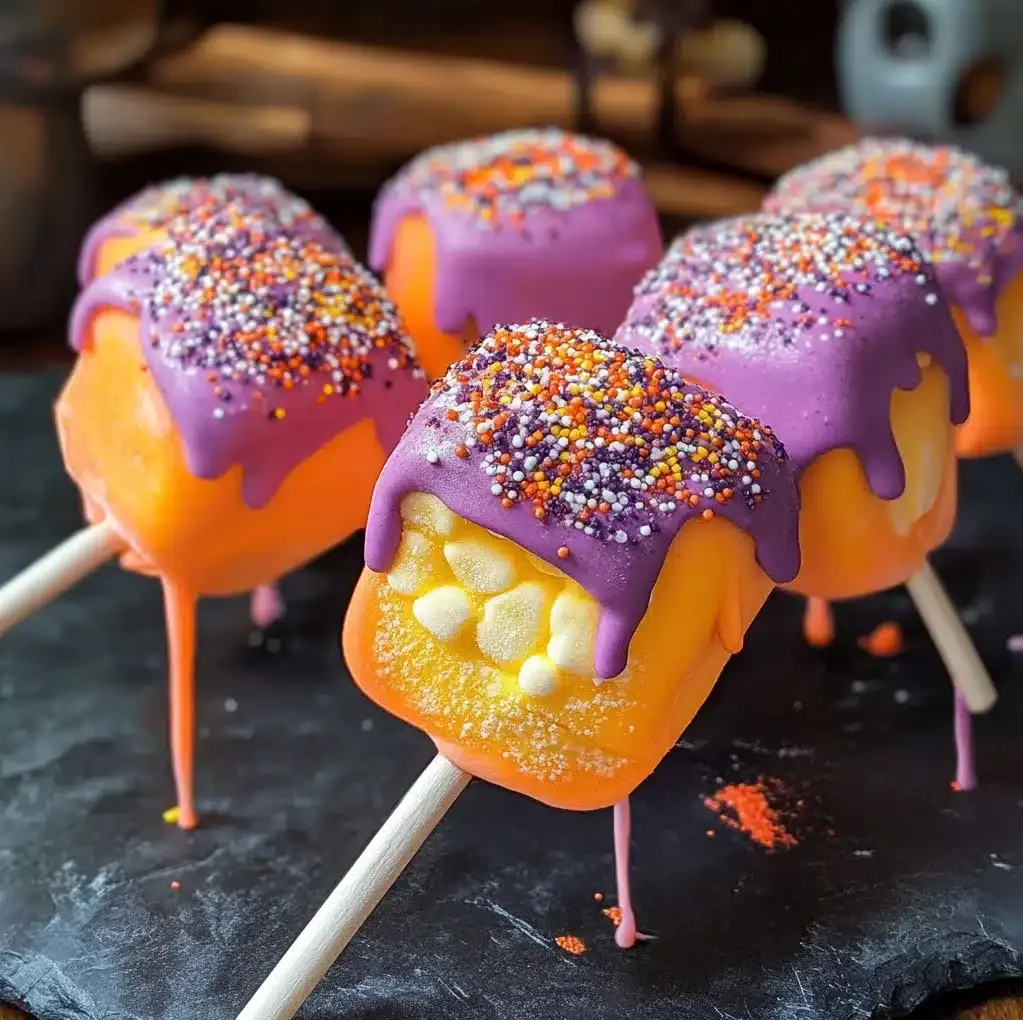
Dip marshmallows – Dip each marshmallow into the melted candy, fully coating it. Gently tap off excess coating.
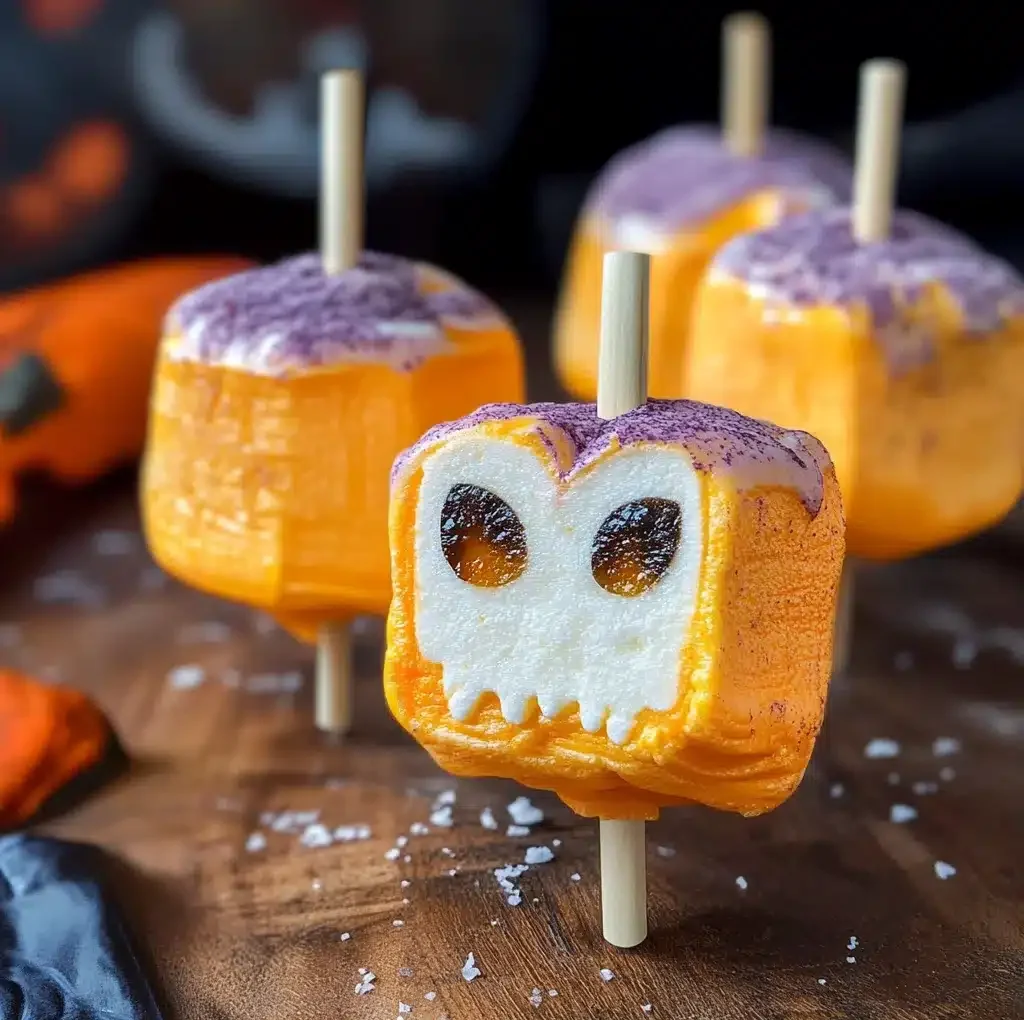
Decorate – While the coating is still wet, decorate with sprinkles, candy eyes, or edible glitter. Create designs inspired by the Sanderson sisters’ outfits if you like.
Set – Place marshmallow pops upright in a styrofoam block or lay them on wax paper until the coating hardens.
Enjoy – Serve immediately or store for later.
 Servings and Pairing
 Servings and Pairing
This recipe makes about 12 marshmallow pops, but you can easily scale it up or down.
Pairing ideas:
- Serve with popcorn for a Halloween movie night.
- Add to a Halloween dessert table alongside cupcakes and candy apples.
- Wrap individually in treat bags for party favors or trick-or-treat giveaways.
- Pair with a glass of milk or hot cocoa for a sweet, cozy snack.
Variations
Want to put your own spin on these pops? Try these fun variations:
- Sanderson Sister Pops – Use candy melts in black, purple, and green to match the iconic witches. Add edible eyes or hair-like sprinkles for extra detail.
- Monster Pops – Add candy eyes and use green candy coating for a Frankenstein look.
- Pumpkin Pops – Use orange candy melts and draw jack-o’-lantern faces with melted chocolate.
- Spiderweb Pops – Dip in black candy coating and drizzle white chocolate in web-like designs.
- Glittery Witch Pops – Roll in edible glitter for a sparkling effect.
The possibilities are endless—just let your imagination run wild!
Storage/Reheating
One of the best things about marshmallow pops is that they store well.
- Room temperature: Store in an airtight container for up to 3 days.
- Refrigerator: Keeps fresh for up to 1 week, though marshmallows may firm slightly.
- Freezer: Not recommended, as freezing affects the marshmallow texture.
- Reheating: No need to reheat—just enjoy as is!
For the best presentation, keep pops wrapped individually until serving.
FAQs
Can I make these marshmallow pops ahead of time?
Yes! They can be made up to 2–3 days in advance and stored in an airtight container.
Do I have to use candy melts?
Candy melts are easiest for vibrant colors, but you can also use white chocolate and add food coloring.
Can kids help make these?
Absolutely! Kids love dipping marshmallows and adding sprinkles—just supervise with the hot candy melts.
How do I keep the candy coating smooth?
Add a little shortening or coconut oil while melting to thin out the mixture.
Can I make these without sticks?
Yes, simply dip marshmallows and serve them as bite-sized treats without sticks.
Conclusion
These Hocus Pocus Marshmallow Pops are more than just a dessert—they’re a fun Halloween project that doubles as a festive snack. With their bright colors, playful decorations, and easy prep, they’ll quickly become a seasonal favorite. Whether you’re hosting a party, handing out treats, or just enjoying a Halloween movie night, these pops will bring a little magic to your celebration.
Print
Hocus Pocus Marshmallow Pops
- Total Time: 15 minutes
- Yield: 12 Servings
- Diet: Vegetarian
Description
These fun and festive Hocus Pocus Marshmallow Pops are the perfect no-bake Halloween treat! Quick to make, colorful, and kid-friendly—great for parties, movie nights, or edible party favors.
Ingredients
- 12 large marshmallows
- 1 ½ cups candy melts (orange, purple, green, or black)
- 1 tsp shortening or coconut oil (optional, for thinning candy melts)
- 12 lollipop sticks or paper straws
- Sprinkles, candy eyes, or edible glitter for decorating
- Optional: melted white chocolate for drizzling (spiderweb effect)
Instructions
- Prepare marshmallows – Insert a lollipop stick into each marshmallow.
- Melt candy melts – Microwave candy melts in 30-second intervals, stirring until smooth. Add a little shortening if too thick.
- Dip marshmallows – Dip each marshmallow into the melted candy, coating completely. Tap off excess.
- Decorate – While still wet, add sprinkles, candy eyes, or glitter.
- Set – Place upright in styrofoam or lay flat on wax paper until hardened.
- Serve and enjoy – Once set, they’re ready to eat or wrap as treats!
Notes
- Use different colors to represent each Sanderson sister (purple, green, and black).
- Add candy eyes to create monster or witch-inspired pops.
- If candy melts seize up, add 1 tsp of coconut oil at a time to smooth.
- Wrap individually in treat bags for party favors or classroom snacks.
- Get kids involved in decorating—they’ll love adding sprinkles and edible glitter.
- Prep Time: 15 minutes
- Cook Time: 0 minutes