
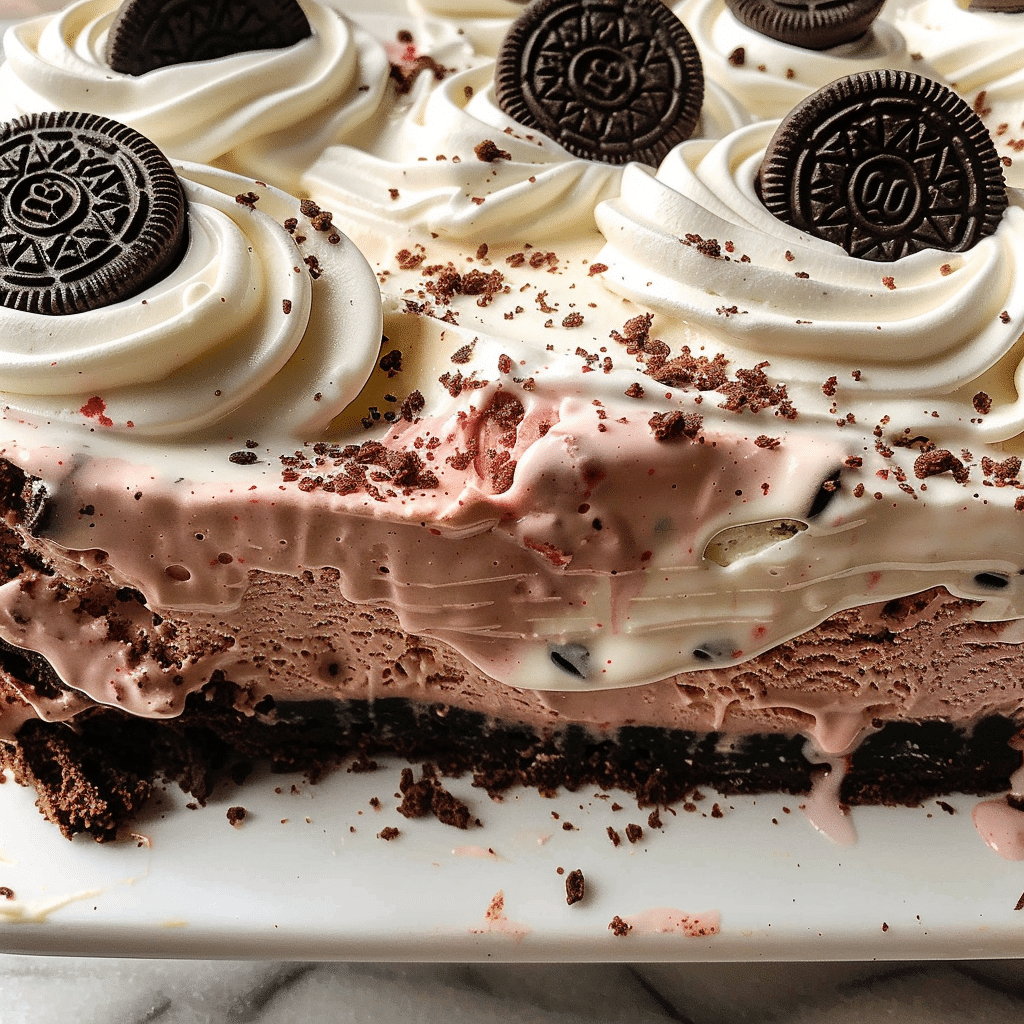
There’s a reason ice cream cake shows up at so many birthdays and summer gatherings, and once you make one at home, it’s easy to see why. Layers of crunchy Oreo crust, two flavors of ice cream, rich hot fudge, and a billowy whipped cream topping come together into a dessert that feels like a real celebration, no matter the occasion.
What I love most about making this at home is the freedom to choose. Stick with the classic chocolate and strawberry combination, or swap in whatever flavors your family loves most. This recipe is really more of a template than a fixed list, which makes it endlessly fun to recreate.
Why You’ll Love This
This cake brings together the nostalgic charm of store-bought ice cream cake with way better flavor and total flexibility on which ice creams you use. The crunchy Oreo base, gooey hot fudge layer, and fresh whipped cream topping make every slice feel special, and the no-bake process keeps the whole thing refreshingly simple.
Ingredients
Oreo cookies: create the crunchy, chocolatey base; graham crackers offer a different but equally tasty crust option.
Unsalted butter: holds the crushed cookies together into a solid crust; melted coconut oil works as a dairy-free swap.
Chocolate ice cream: forms the first creamy layer; any flavor you love can take its place.
Hot fudge: adds a rich layer between the ice creams and a finishing drizzle; caramel sauce can be used instead or alongside.
Strawberry ice cream: makes up the second layer; vanilla, cookies and cream, or any favorite flavor works just as well.
Heavy cream: whips into the airy topping that finishes the cake; frozen whipped topping can be substituted in a pinch.
Confectioners’ sugar: sweetens the whipped cream while keeping it smooth; granulated sugar can be used but won’t dissolve as evenly.
Vanilla extract: rounds out the topping with classic flavor; almond extract offers a different twist.
Craving the exact amounts? You’ll find all the precise measurements in the recipe card below!

How to Make Ice Cream Cake
Step 1: Build the Crust
Pulse the Oreos into fine crumbs, then stir in melted butter until the mixture looks like damp sand. Press it firmly into a springform pan and freeze briefly to set.
Step 2: Add the First Layer
Spread the softened chocolate ice cream evenly over the chilled crust, then freeze until firm before moving forward.
Step 3: Layer the Fudge
Spread half the hot fudge over the firm ice cream layer, letting it settle into an even ribbon. Freeze again briefly so the next layer has something solid to rest on.
Step 4: Add the Second Layer
Spread the softened strawberry ice cream over the fudge, smoothing the top. The contrast of colors between layers already looks bakery-worthy.
Step 5: Freeze Until Solid
Let the cake freeze for several hours, or overnight, until completely firm. This is what gives you those clean, defined layers once sliced.
Step 6: Whip the Topping
In a chilled bowl, whip the cream with confectioners’ sugar and vanilla until soft, billowy peaks form.
Step 7: Finish and Serve
Release the cake from the pan and spread or pipe the whipped cream generously over the top. Drizzle with remaining hot fudge and scatter sprinkles for a festive finish before slicing.
Tips for Success
- Soften ice cream just until spreadable, not melted, for the cleanest layers.
- Freeze between each layer so they stay distinct rather than blending.
- Use a springform pan for the easiest release once frozen solid.
- Dip your knife in hot water before slicing for clean cuts.
- Make the whipped topping right before serving for the freshest texture.
- Let the cake sit a few minutes at room temperature before slicing if it’s too firm.
Equipment Needed
- Springform pan: makes layering and releasing the cake easy; a plastic wrap-lined cake pan works as an alternative.
- Food processor: quickly crushes the Oreos; a zip-top bag and rolling pin work too.
- Stand or hand mixer: needed for whipping the cream to stiff peaks; a whisk works for smaller batches.
Variations
- Gluten-Free: use gluten-free chocolate sandwich cookies for the crust.
- Lighter Version: use a reduced-fat ice cream and lighter whipped topping.
- Faster Version: use store-bought whipped topping instead of whipping your own cream.
- Budget-Friendly: use store-bought hot fudge and a single ice cream flavor.
- High-Protein Boost: use a high-protein ice cream brand for both layers.
Serving Suggestions
- Drizzle extra hot fudge or caramel over each slice.
- Pair with fresh berries for a fruity contrast.
- Top with maraschino cherries for a classic sundae feel.
- Serve alongside coffee or espresso for an after-dinner treat.
FAQs
Can I use any ice cream flavors I want?
Yes, this recipe is built to be flexible. Any two complementary flavors, like mint chip and chocolate or cookie dough and vanilla, work beautifully.
How long does this cake keep in the freezer?
Well-wrapped, it keeps for up to 2 weeks without major texture changes. Cover tightly to prevent ice crystals.
Can I make this cake ahead of a party?
Yes, this is an ideal make-ahead dessert. Prepare it up to 2 days in advance and add the whipped cream topping the day of serving.
Why is my cake hard to slice?
If it’s too frozen, let it sit at room temperature for 10-15 minutes. Dipping your knife in hot water between cuts also helps.
Final Thoughts
This ice cream cake brings all the fun of a classic frozen treat into a customizable, no-bake dessert perfect for any celebration. Whether you stick with the classic flavor combo or get creative with your own favorites, it’s guaranteed to make any occasion feel a little more special.
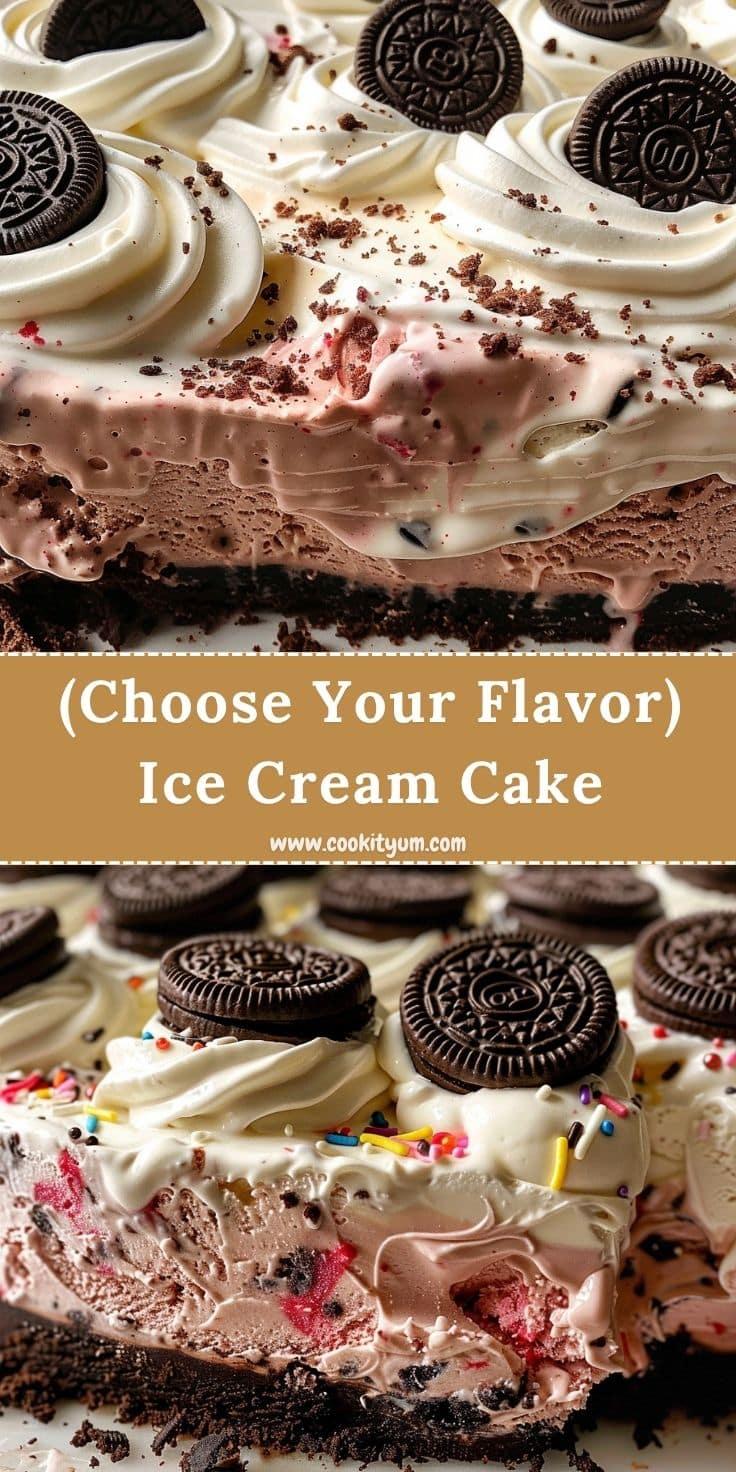
Ice Cream Cake (Choose Your Flavor)
- Total Time: 5 hours 30 minutes
- Yield: 12 Servings
- Diet: Vegetarian
Description
A no-bake layered dessert built on a crunchy Oreo crust, two layers of your favorite ice cream, a ribbon of hot fudge, and a fluffy homemade whipped cream topping.
Ingredients
Cake:
- 10 Oreo cookies (110g)
- 2 tablespoons (28g) unsalted butter, melted
- 1.5 quarts (1.42L) chocolate ice cream, softened (or flavor of choice)
- 1 cup (227g) homemade or store-bought hot fudge, divided
- 1.5 quarts (1.42L) strawberry ice cream, softened (or flavor of choice)
Topping:
- 2 cups (480ml) heavy cream, cold
- 1/3 cup (40g) confectioners’ sugar
- 1.5 tsp pure vanilla extract
- Sprinkles, optional for garnish
Instructions
- Pulse the Oreos into fine crumbs in a food processor, then stir in the melted butter until combined.
- Press the mixture firmly into the bottom of a springform pan and freeze for 10 minutes.
- Spread the softened chocolate ice cream over the crust and freeze for 30 minutes until firm.
- Spread half the hot fudge over the chocolate layer, then freeze for another 15-20 minutes.
- Spread the softened strawberry ice cream over the fudge layer and smooth the top.
- Freeze for at least 4 hours, or until completely firm.
- Whip the heavy cream, confectioners’ sugar, and vanilla in a chilled bowl until stiff peaks form.
- Release the cake from the pan and spread or pipe the whipped cream over the top.
- Drizzle with remaining hot fudge and add sprinkles if desired before slicing.
Notes
Same recipe as before — here’s a fresh version for your second blog with different wording.
📌 Pinterest Pin Title
No-Bake Ice Cream Cake: Pick Your Favorite Flavors! (54 characters)
📌 Pinterest Description
Style B — Warm + Storytelling:
Birthdays, backyard parties, or just a hot summer evening — this layered ice cream cake fits every occasion that calls for something cold and celebratory. A crunchy Oreo crust, two layers of your favorite ice cream, a ribbon of hot fudge, and a cloud of homemade whipped cream on top come together into a dessert that always steals the show. The best part is you get to pick the flavors, so it’s never quite the same cake twice. Save it for your next celebration! 🍦🎉✨
#IceCreamCakeRecipe #FrozenDessertIdeas #OreoCrustDessert #BirthdayDessertIdeas #HomemadeIceCreamCake #NoBakeRecipes #SummerCelebrationFood #HotFudgeDessert #WhippedCreamRecipe #LayeredDessert #PartyDessertRecipes #FrozenTreats #EasyDessertIdeas #SweetTreatRecipes #PinterestRecipes
🃏 Recipe Card
Ice Cream Cake (Choose Your Flavor)
A no-bake layered dessert built on a crunchy Oreo crust, two layers of your favorite ice cream, a ribbon of hot fudge, and a fluffy homemade whipped cream topping.
Ingredients:
Cake:
- 10 Oreo cookies (110g)
- 2 tablespoons (28g) unsalted butter, melted
- 1.5 quarts (1.42L) chocolate ice cream, softened (or flavor of choice)
- 1 cup (227g) homemade or store-bought hot fudge, divided
- 1.5 quarts (1.42L) strawberry ice cream, softened (or flavor of choice)
Topping:
- 2 cups (480ml) heavy cream, cold
- 1/3 cup (40g) confectioners’ sugar
- 1.5 tsp pure vanilla extract
- Sprinkles, optional for garnish
Instructions:
- Pulse the Oreos into fine crumbs in a food processor, then stir in the melted butter until combined.
- Press the mixture firmly into the bottom of a springform pan and freeze for 10 minutes.
- Spread the softened chocolate ice cream over the crust and freeze for 30 minutes until firm.
- Spread half the hot fudge over the chocolate layer, then freeze for another 15-20 minutes.
- Spread the softened strawberry ice cream over the fudge layer and smooth the top.
- Freeze for at least 4 hours, or until completely firm.
- Whip the heavy cream, confectioners’ sugar, and vanilla in a chilled bowl until stiff peaks form.
- Release the cake from the pan and spread or pipe the whipped cream over the top.
- Drizzle with remaining hot fudge and add sprinkles if desired before slicing.
Tips:
- Soften the ice cream just enough to spread without melting, for the cleanest layers.
- Freeze between layers so they stay distinct when sliced.
- Prep Time: 30 minutes
- freezing time: 5 hours
- Cook Time: 0 minutes