
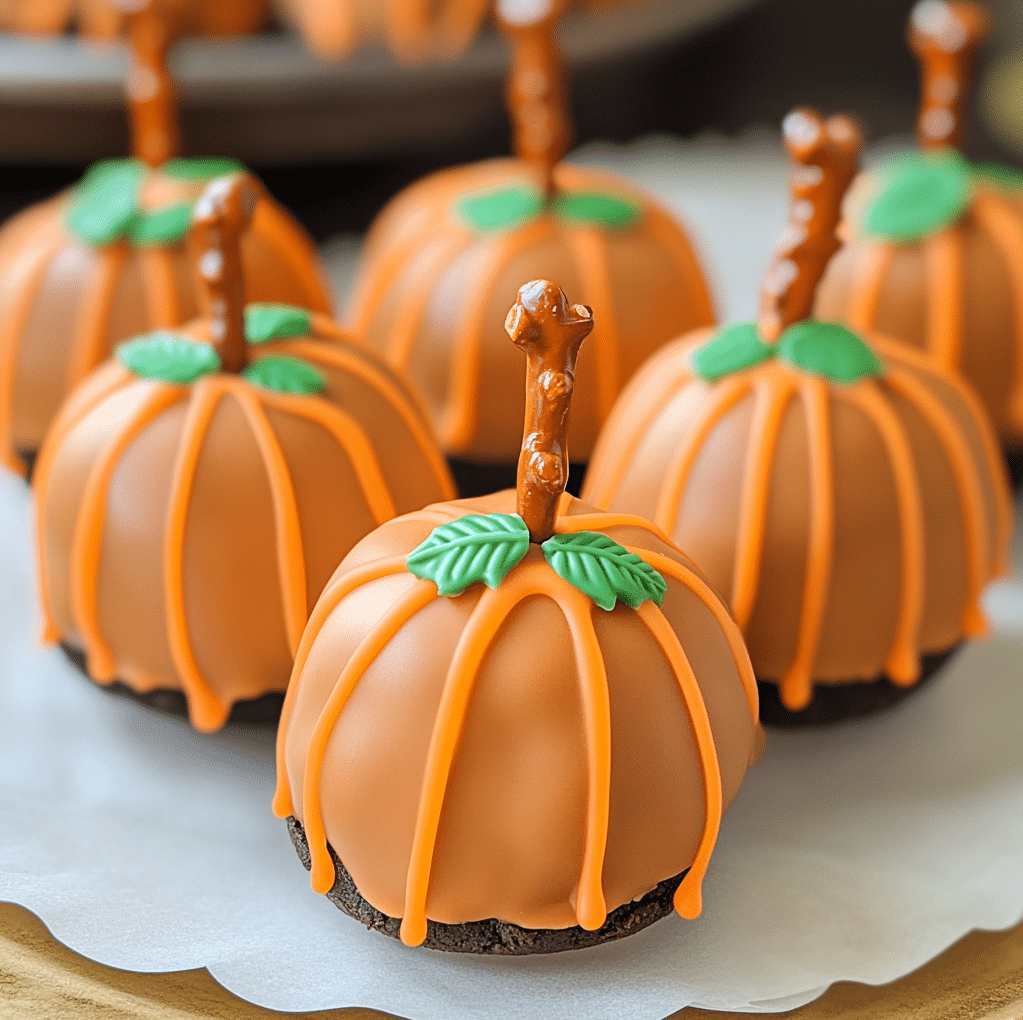
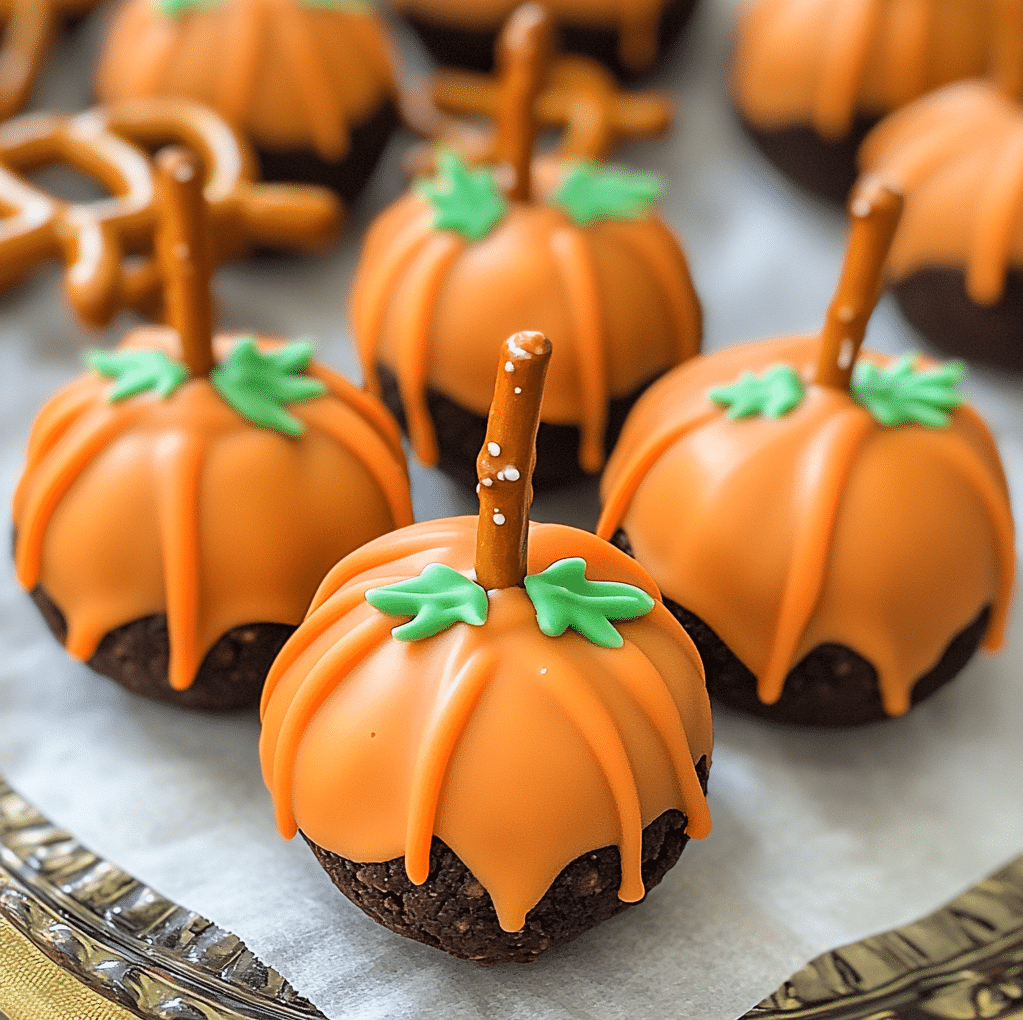
When fall rolls around, pumpkin-themed treats take over every dessert table—and for good reason! They’re cozy, festive, and oh-so-delicious. But what if you could enjoy the magic of pumpkin season without turning on the oven? Enter no-bake pumpkin Oreo balls. These bite-sized desserts are dipped in vibrant orange chocolate, topped with pretzel sticks for stems, and finished with green leaf icing decorations. The result? Adorable mini pumpkins that taste just as amazing as they look.
Whether you’re hosting a Halloween party, a Thanksgiving feast, or simply want to surprise your kids with a fun treat, these Oreo balls are guaranteed to steal the spotlight. They’re easy to make, require only a handful of ingredients, and best of all—you don’t need to bake a single thing.
Why You’ll Love This Recipe
There are plenty of reasons to fall in love with no-bake pumpkin Oreo balls.
Easy & No-Bake – You don’t need to be a pro baker to make these. If you can crush Oreos and melt chocolate, you’ve got this recipe covered.
Kid-Friendly Project – Kids will love helping roll the balls, dip them in chocolate, and add the pretzel stems.
Perfectly Festive – Their pumpkin shape makes them perfect for autumn gatherings, Halloween parties, or Thanksgiving dessert trays.
Make Ahead Friendly – You can prepare them ahead of time, refrigerate, and serve when needed.
Customizable – Switch up the chocolate, add sprinkles, or use different decorative touches to suit your style.
Think of these as a combination of truffles, cake pops, and holiday décor all in one delicious bite!
Ingredients
Tip: You’ll find the full list of ingredients and measurements in the recipe card below.
Oreos – Classic chocolate sandwich cookies, finely crushed.
Cream Cheese – Softened, helps bind the mixture together.
Orange Candy Melts – For dipping and giving that pumpkin look.
Pretzel Sticks – Broken into small pieces to act as stems.
Green Icing or Candy Leaves – To decorate the tops like pumpkin leaves.
Optional: A sprinkle of edible glitter or colored sugar for extra sparkle.
Directions
Making these pumpkin Oreo balls is simple and fun:
Prepare the Mixture – Crush Oreos in a food processor until fine crumbs form. Add softened cream cheese and blend until smooth and sticky.
Form the Balls – Roll the mixture into 1-inch balls and place them on a parchment-lined tray. Refrigerate for 20–30 minutes until firm.
Melt the Chocolate – In a microwave-safe bowl, melt orange candy melts in 20-second intervals, stirring in between until smooth.
Dip & Coat – Using a fork or dipping tool, coat each ball in melted chocolate. Tap off excess and place back on the tray.
Add Decorations – While the coating is still wet, insert a small piece of pretzel stick on top to resemble a stem. Use green icing or candy decorations for the leaf.
Set & Serve – Allow the chocolate to harden at room temperature or in the fridge. Once set, they’re ready to enjoy!
 Servings and Pairing
 Servings and Pairing
This recipe makes about 24 Oreo balls, depending on the size you roll them.
Pairing ideas:
Serve alongside other festive treats like caramel apples, pumpkin bread, or candy corn.
Pair with hot chocolate, pumpkin spice lattes, or apple cider for a cozy fall vibe.
Add to a dessert charcuterie board for a show-stopping holiday spread.
These little pumpkins aren’t just desserts—they’re edible decorations!
Variations
Want to change things up? Here are some fun twists:
Different Colors – Use white candy melts with orange food coloring or even dip some in green for variety.
Flavored Oreos – Try pumpkin spice Oreos or golden Oreos for a unique flavor.
Chocolate Drizzle – Add a drizzle of dark chocolate for extra flair.
Sprinkles & Glitter – Decorate with festive sprinkles for a more playful look.
Holiday Swap – Instead of pumpkins, use red candy melts and mini candy canes for a Christmas version!
Storage/Reheating
The beauty of these Oreo balls is how well they store:
Refrigerator – Keep in an airtight container for up to 5 days.
Freezer – Freeze for up to 2 months. Just thaw in the fridge before serving.
Reheating – Not necessary since this is a no-bake recipe. If the chocolate softens, simply chill them again.
Tip: Store in single layers with parchment paper in between to prevent sticking.
FAQs
1. Can I make Oreo balls ahead of time?
Yes! They’re actually better when made ahead since chilling helps the flavors meld.
2. What if I don’t have candy melts?
You can use white chocolate with orange food coloring, or even regular chocolate for a different look.
3. Can I use flavored cream cheese?
Yes, pumpkin spice or vanilla-flavored cream cheese adds a seasonal twist.
4. Do Oreo balls need to be refrigerated?
Yes, because of the cream cheese, they should always be stored in the fridge.
5. How can I make them more kid-friendly?
Let kids handle the decorating—adding pretzel sticks and green leaves is fun and easy!
Conclusion
No-bake pumpkin Oreo balls are the ultimate fall treat—adorable, delicious, and incredibly simple to make. They’re perfect for adding a festive touch to Halloween parties, Thanksgiving gatherings, or just a cozy family night in. With their creamy center, crunchy coating, and playful pumpkin design, they’ll disappear from the dessert table in no time.
Print
No-Bake Pumpkin Oreo Balls
- Total Time: 25 minutes
- Yield: 24 balls
- Diet: Vegetarian
Description
These No-Bake Pumpkin Oreo Balls are festive, fun, and delicious! Made with Oreos, cream cheese, orange chocolate, and pretzel sticks, they’re the perfect fall or Halloween party treat.
Ingredients
- 36 Oreos (classic chocolate sandwich cookies, finely crushed)
- 8 oz cream cheese (softened)
- 2 cups orange candy melts (or white chocolate with orange food coloring)
- 12 pretzel sticks (broken into small pieces for stems)
- Green icing or candy leaves (for decoration)
Optional: Sprinkles or edible glitter for extra decoration.
Instructions
- Prepare the Oreo mixture – Crush Oreos in a food processor until fine crumbs form. Add softened cream cheese and blend until smooth and sticky.
- Form the balls – Roll mixture into 1-inch balls and place on a parchment-lined baking tray. Chill in the refrigerator for 20–30 minutes until firm.
- Melt the coating – Melt orange candy melts in a microwave-safe bowl, heating in 20-second intervals and stirring until smooth.
- Dip the balls – Using a fork or dipping tool, dip each chilled ball into melted candy coating, tapping off the excess. Place back on the tray.
- Decorate – While the coating is still wet, insert a pretzel piece into the top as a stem and add green icing or candy leaves for decoration.
- Set & serve – Let the chocolate harden in the fridge or at room temperature. Serve and enjoy!
Notes
- For less messy dipping, use a fork or dipping tool and gently tap against the bowl.
- Chill the Oreo balls before dipping so they hold their shape better.
- If the candy melts are too thick, add a teaspoon of coconut oil or vegetable shortening to thin them out.
- Make ahead and refrigerate for stress-free entertaining.
- Prep Time: 25 minutes
- Cook Time: 0 minutes