
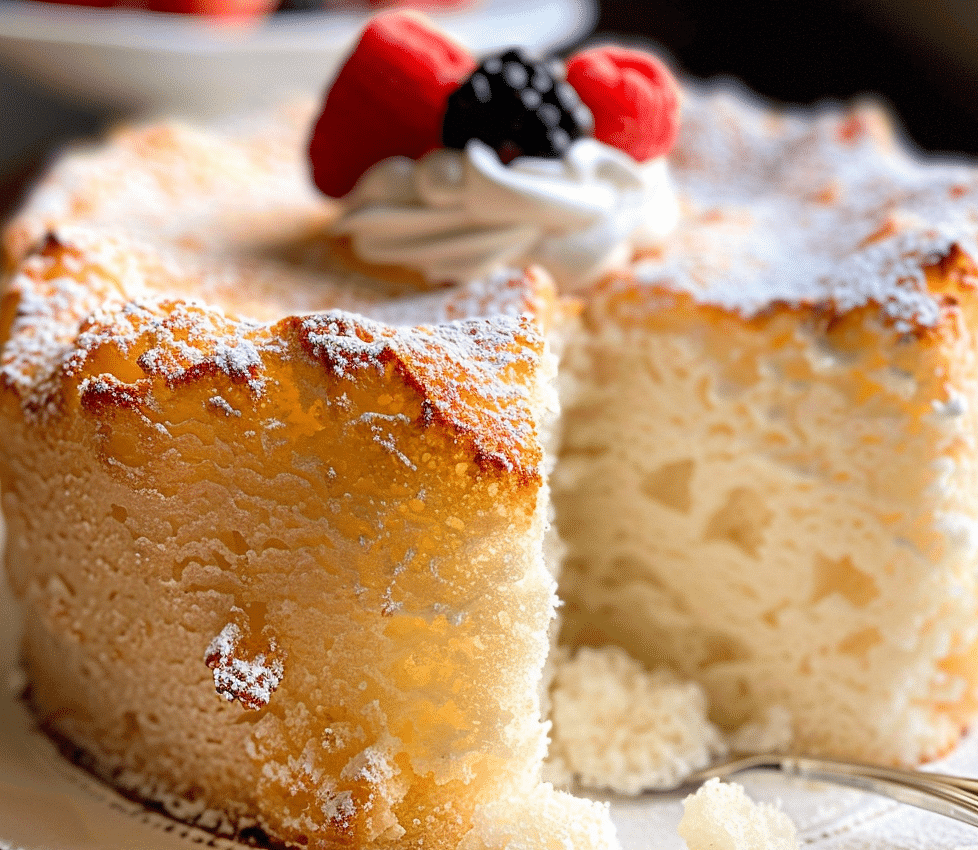
There’s something almost magical about watching a bowl of egg whites transform into a tall, cloud-like cake, and angel food cake has remained one of my favorite baking projects for exactly that reason. It’s a recipe that rewards patience and a gentle hand, and the result is a cake so light and airy it practically melts the moment it touches your tongue.
Why You’ll Love This Angel Food Cake
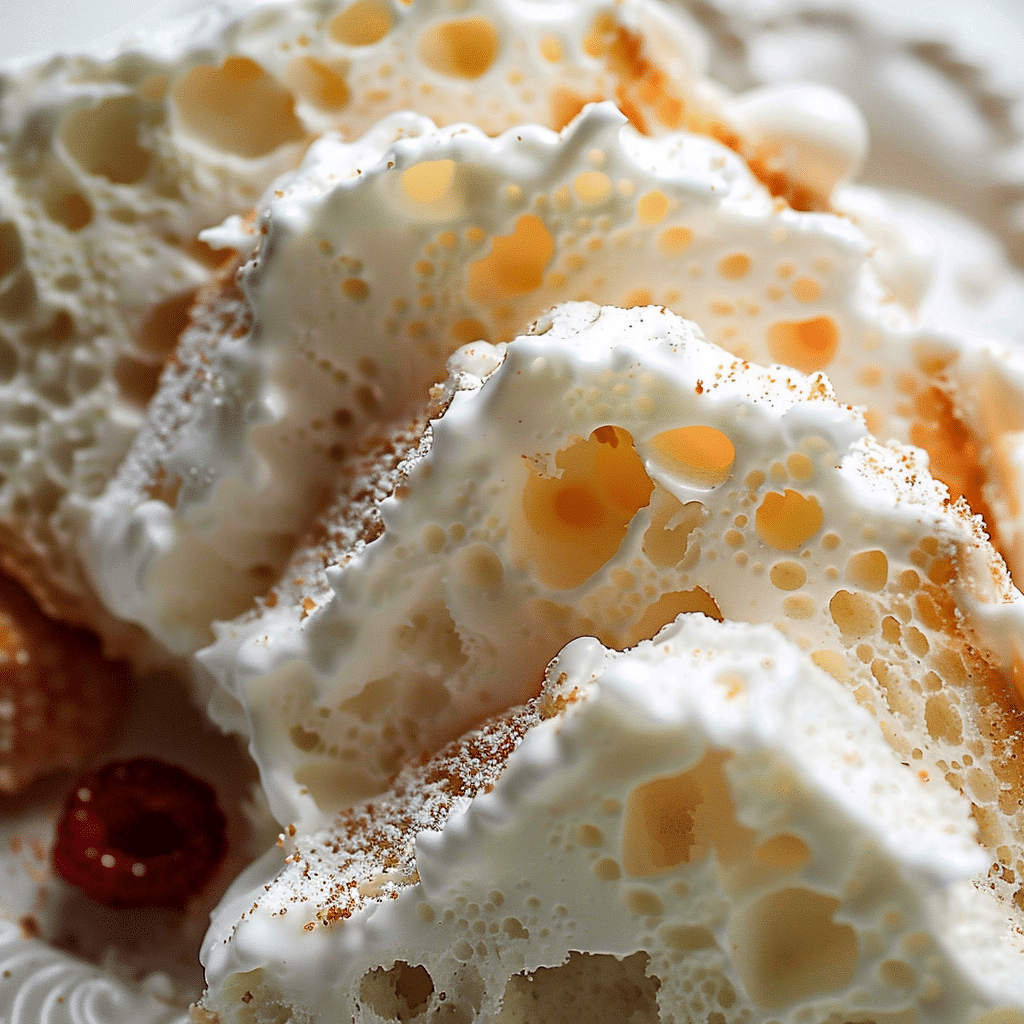
This cake is the definition of light and airy, with a delicate sweetness and a soft, pillowy texture that sets it apart from any other cake in your repertoire. It’s naturally low in fat since there’s no butter or oil involved, making it feel like a lighter indulgence, while still delivering that classic, comforting flavor everyone loves.
Ingredients for Angel Food Cake
- 1 3/4 cups (350g) granulated sugar
- 1 cup + 2 tablespoons (133g) cake flour, spooned and leveled
- 1/4 tsp salt
- 12 large egg whites, at room temperature
- 1 1/2 tsp cream of tartar
- 1 1/2 tsp pure vanilla extract
- Confectioners’ sugar, whipped cream, and berries, optional for serving
Craving the exact amounts? You’ll find all the precise measurements in the recipe card below!
How to Make Angel Food Cake
Step 1: Prep the Dry Ingredients
Pulse half the sugar together with the cake flour and salt in a food processor until finely blended. This extra step helps create an even finer texture that folds seamlessly into the whipped egg whites later.
Step 2: Whip the Egg Whites
Beat the egg whites with cream of tartar until foamy and starting to hold soft peaks. You’ll notice the mixture turning glossy and almost cloud-like as it builds volume.
Step 3: Add Sugar Gradually
Slowly add the remaining sugar while continuing to beat, watching the egg whites transform into stiff, glossy peaks that hold their shape beautifully when the beater is lifted.
Step 4: Add Vanilla
Beat in the vanilla extract just until incorporated, taking care not to deflate all that hard-earned volume in the egg whites.
Step 5: Fold in the Flour Mixture
Sift the flour mixture over the whipped egg whites in small batches, gently folding after each addition. Take your time here, folding just until no streaks of flour remain, keeping as much air in the batter as possible.
Step 6: Bake to Golden Perfection
Pour the batter into an ungreased tube pan, smoothing the top gently. Bake until the top turns golden and springs back when lightly touched, filling your kitchen with a warm, sweet aroma.
Step 7: Cool Upside Down
Immediately invert the pan after baking and let the cake cool completely in this position. This unusual step is what keeps the delicate structure from collapsing under its own weight as it cools.
Tips for Success
- Make sure your mixing bowl and beaters are completely grease-free for the best whipped egg whites.
- Use room temperature egg whites for maximum volume when whipping.
- Fold gently and patiently to avoid deflating the whipped egg whites.
- Never grease the tube pan; the batter needs to cling to the sides to rise properly.
- Cool the cake fully upside down before attempting to remove it from the pan.
- Use a serrated knife to slice the cake cleanly without compressing the delicate crumb.
Equipment Needed
- Tube pan: essential for the cake’s structure and signature shape; a bundt pan can work, though release may be trickier.
- Stand mixer or hand mixer: needed for whipping the egg whites to stiff peaks; this step is very difficult to do well by hand.
- Food processor: helps finely blend half the sugar with the flour and salt; a fine sieve and extra mixing can work as an alternative.
Variations
- Gluten-Free: substitute a 1:1 gluten-free cake flour blend, though texture may vary slightly from the classic version.
- Lighter Version: this cake is already naturally low in fat as written, with no butter or oil used.
- Faster Version: use a carton of liquid egg whites instead of separating whole eggs to save prep time.
- Budget-Friendly: use regular granulated sugar processed at home instead of purchasing superfine sugar.
- High-Protein Boost: serve with a side of Greek yogurt and berries for an extra protein boost alongside each slice.
Serving Suggestions
- Serve with a generous dollop of freshly whipped cream and mixed berries.
- Pair with a light dusting of confectioners’ sugar for a simple, elegant finish.
- Enjoy alongside fresh lemon curd for a bright, tangy contrast.
- Serve with a scoop of sorbet for a refreshing, not-too-sweet dessert.
FAQs about Angel Food Cake
Why shouldn’t I grease the tube pan?
The batter needs to cling to the ungreased sides of the pan in order to climb and hold its tall, airy structure while baking. Greasing the pan would cause the cake to slide back down and collapse.
Why do I need to cool the cake upside down?
Cooling upside down prevents the delicate, airy structure from collapsing under its own weight while it’s still warm and fragile. Most tube pans have small feet or a bottle neck specifically for this purpose.
Can I use a regular cake pan instead of a tube pan?
A tube pan is highly recommended since it gives the batter something to climb and cling to as it rises. A regular cake pan won’t provide the same support and will likely result in a denser, flatter cake.
How should I store angel food cake?
Store the cooled cake covered at room temperature for up to 2 days, or in the refrigerator for up to a week. It can also be frozen, well-wrapped, for up to 2 months.
Final Thoughts
Angel food cake is a true classic that proves a simple list of ingredients can create something truly spectacular with the right technique and a little patience. Light, airy, and endlessly versatile with toppings, this is a cake that’s well worth the extra care it takes to make, rewarding you with a slice of pure, fluffy perfection every timeay time.
Angel Food Cake
- Total Time: 1 hour 3 minutes
- Yield: 12 servings
- Diet: Vegetarian
Description
A classic light and airy cake made from whipped egg whites, sugar, and cake flour, baking up tall and pillowy soft with a delicate sweetness, perfect plain or topped with berries and whipped cream.
Ingredients
- 1 3/4 cups (350g) granulated sugar
- 1 cup + 2 tablespoons (133g) cake flour, spooned and leveled
- 1/4 tsp salt
- 12 large egg whites, at room temperature
- 1 1/2 tsp cream of tartar
- 1 1/2 tsp pure vanilla extract
- Confectioners’ sugar, whipped cream, and berries, optional for serving
Instructions
- Preheat the oven to 350°F (175°C). Do not grease the tube pan.
- Pulse half the granulated sugar with the cake flour and salt in a food processor until finely combined, then set aside.
- In a large bowl, beat the egg whites and cream of tartar on medium speed until foamy.
- Gradually add the remaining granulated sugar, beating until stiff, glossy peaks form.
- Beat in the vanilla extract until just combined.
- Sift the flour mixture over the egg whites in batches, gently folding after each addition until no streaks remain.
- Pour the batter into an ungreased tube pan, smoothing the top with a spatula.
- Bake for 35-40 minutes, until the top is golden and springs back when lightly touched.
- Immediately invert the pan and let the cake cool completely upside down before removing.
Notes
- Use a food processor to break down the sugar finer for a more tender crumb.
- Cool the cake completely upside down to prevent it from collapsing.
- Prep Time: 25 minutes
- Cook Time: 38 minutes