
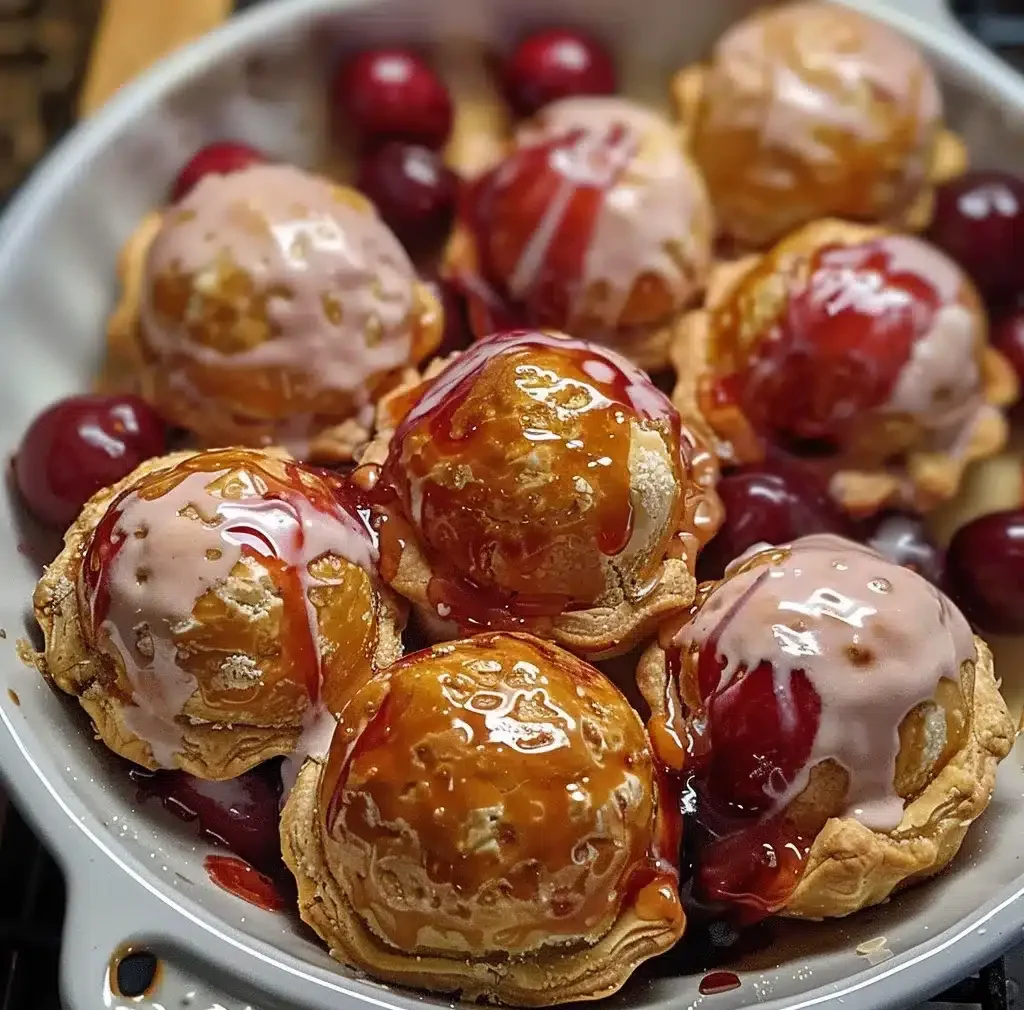
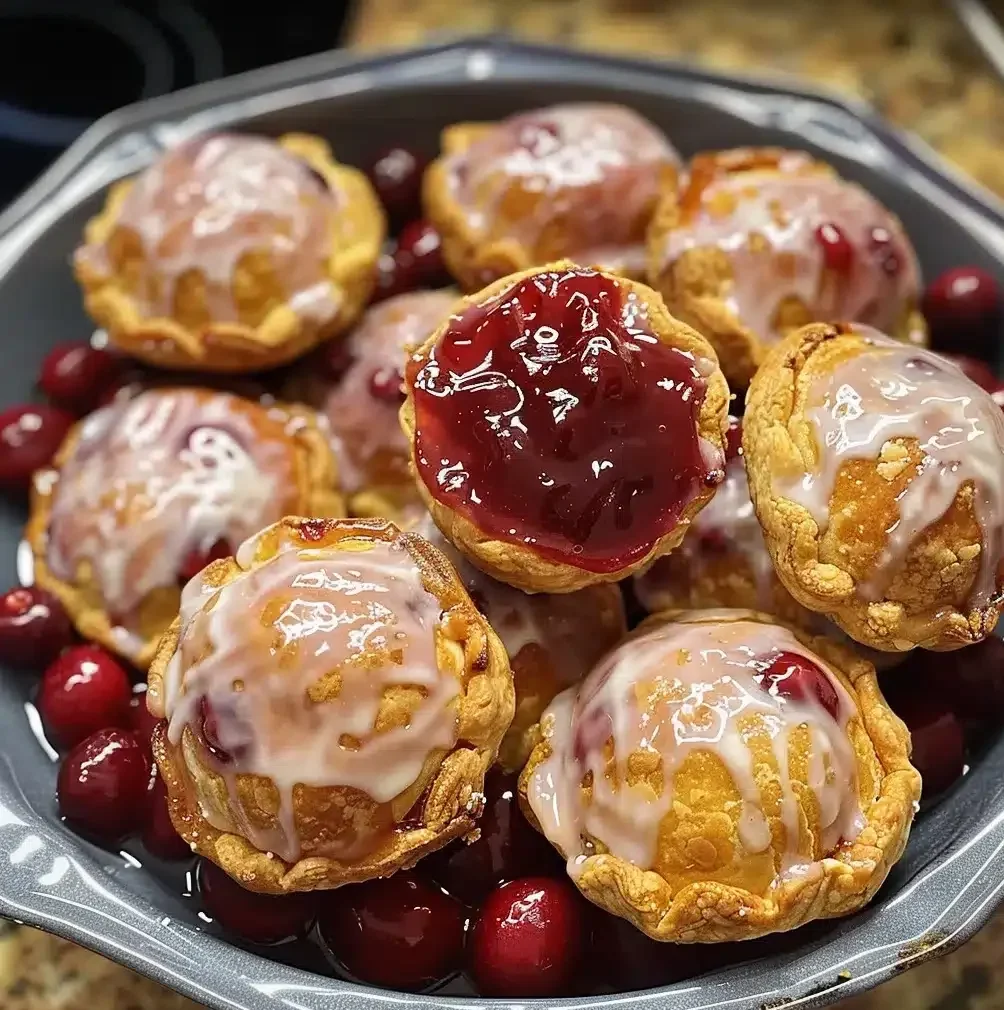
If you’ve got a soft spot for classic cherry pie but don’t want to spend hours rolling out dough and waiting for it to bake, then Cherry Pie Bombs are about to be your new favorite dessert! These little golden bites are everything you love about pie—sweet, tangy cherry filling wrapped in a flaky, buttery crust—but in a perfectly portioned, handheld treat. They’re easy to make, fun to serve, and almost too cute to eat (almost!). Whether you’re whipping them up for a family get-together, a festive party, or just a cozy night at home, these Cherry Pie Bombs are guaranteed to steal the show.
Why You’ll Love This Recipe
There are plenty of dessert recipes out there, but Cherry Pie Bombs stand out for their simplicity and incredible flavor. Here’s why you’ll absolutely adore them:
- Quick and easy: This recipe requires minimal prep and uses simple ingredients—perfect for beginners or anyone short on time.
- Portable treats: No plates, no forks, no mess. Just pop one in your mouth and enjoy!
- Crispy on the outside, gooey on the inside: The contrast between the flaky golden crust and the warm cherry filling is simply irresistible.
- Versatile: You can bake them in the oven, air fryer, or even deep fry them for an extra crunch.
- Crowd-pleaser: Whether it’s for kids or adults, no one can resist these sweet, bite-sized pies.
It’s the kind of dessert that feels homemade and special, yet effortless enough to throw together even on busy days.
Ingredients You’ll Need
(Tip: You’ll find the full list of ingredients and measurements in the recipe card below.)
Here’s a quick overview of what you’ll need to make the most delicious Cherry Pie Bombs:
- Refrigerated biscuit dough or puff pastry: This forms the golden, flaky outer layer. Choose whatever’s convenient—both work beautifully.
- Cherry pie filling: The star of the show! Go for your favorite brand or homemade cherry filling for a richer flavor.
- Powdered sugar (optional): For that lovely dusting on top after baking.
- Butter: Brushing melted butter on the outside before baking gives your pie bombs that perfect golden shine.
- Cinnamon sugar (optional): Adds a warm, sweet touch to the crust for extra flavor.
- Oil (if frying): If you prefer deep-fried pie bombs, make sure you use a neutral oil like vegetable or canola.
These simple ingredients come together to make something magical—crispy, sweet, and perfectly bite-sized desserts that’ll have everyone asking for seconds.
Let’s Get Started
Now that you’ve got everything ready, let’s dive into the fun part—making your Cherry Pie Bombs!
Step 1: Prep the dough
Start by preheating your oven (or air fryer) to 375°F (190°C). Take your biscuit dough or puff pastry and flatten each piece slightly with your hands or a rolling pin. You want enough surface area to hold the cherry filling.
Step 2: Add the cherry filling
Spoon about a teaspoon of cherry pie filling into the center of each dough piece. Be careful not to overfill—it might leak during baking.
Step 3: Seal the bombs
Fold the dough over the filling and pinch the edges tightly to seal. You can roll them into small balls to make sure everything stays inside.
Step 4: Add the finishing touches
Brush each dough ball with melted butter and, if you like, sprinkle with cinnamon sugar for a sweet, crisp finish.
Step 5: Bake or fry
- Oven method: Place the bombs on a parchment-lined baking sheet and bake for 10–12 minutes, or until golden brown.
- Air fryer method: Cook at 350°F (175°C) for about 8 minutes, flipping halfway through.
- Frying method: Heat oil in a pan to 350°F and fry the bombs until golden, about 2–3 minutes per side.
Step 6: Cool and serve
Let your Cherry Pie Bombs cool for a few minutes, then dust them with powdered sugar or drizzle with icing if you like. Serve warm for the best gooey experience!
Servings and Pairing
This recipe typically makes around 12–16 pie bombs, depending on the size of your dough pieces. They’re perfect for sharing—or for treating yourself to more than one!
Pairing ideas:
- Serve with vanilla ice cream for a classic cherry pie à la mode experience.
- Dip them in cream cheese frosting or chocolate sauce for extra indulgence.
- Pair with a hot drink like coffee, hot cocoa, or spiced tea for cozy comfort on a chilly day.
You can even create a dessert platter with a mix of fruit pie bombs (apple, blueberry, peach) for parties or holidays.
Variations
The beauty of this recipe lies in its flexibility. You can easily swap out ingredients or experiment with flavors to make it your own.
Here are a few fun ideas:
- Mixed Berry Bombs: Combine cherry, blueberry, and raspberry fillings for a colorful twist.
- Chocolate Cherry Bombs: Add a small chocolate chip with the cherry filling for a gooey chocolate-cherry surprise.
- Savory version: Try using cream cheese and cherry preserves for a tangy, slightly savory bite.
- Glazed Bombs: Drizzle with a simple sugar glaze made of powdered sugar and milk for a bakery-style finish.
- Mini Cheesecake Bombs: Add a teaspoon of sweetened cream cheese along with the cherry filling—like a cherry cheesecake in one bite!
You can even play with the dough—use croissant dough for a buttery flavor or homemade pie crust for a rustic touch.
Storage Tips
If you somehow have leftovers (which is rare!), here’s how to keep them fresh:
- Room temperature: Store in an airtight container for up to 2 days.
- Refrigerator: Keep for up to 5 days; reheat in the oven for a few minutes to crisp them back up.
- Freezer: Freeze baked or unbaked pie bombs for up to 2 months. Thaw and bake or reheat when ready to serve.
Pro Tip: Avoid microwaving them directly—it can make the crust soggy. Instead, reheat in an oven or air fryer to bring back that perfect crispness.
FAQs
Can I use homemade cherry pie filling instead of canned?
Absolutely! Homemade cherry pie filling adds a fresh, tangy flavor. Just make sure it’s thick enough so it doesn’t leak during baking.
Can I use other fruits?
Yes! Blueberry, apple, or peach pie fillings work wonderfully in this recipe.
Can I make these ahead of time?
Definitely. Prepare the bombs and refrigerate them (unbaked) for up to 24 hours before baking.
What if I don’t have biscuit dough?
You can use puff pastry, crescent roll dough, or even homemade pie crust.
How do I make them extra crispy?
Brush them with melted butter and sprinkle with a little sugar before baking—that’ll give you the perfect golden crunch!
Final Thoughts
Cherry Pie Bombs are the kind of dessert that reminds you why baking can be so much fun. They’re simple, satisfying, and bursting with sweet cherry flavor in every bite. Whether you serve them warm at a party, pack them for a picnic, or enjoy them as a late-night snack, these mini pies never disappoint.
Print
Cherry Pie Bombs
- Total Time: 22 minutes
- Yield: 12 Servings
- Diet: Vegetarian
Description
These Cherry Pie Bombs are bite-sized, flaky pastries filled with sweet cherry pie filling—quick, easy, and absolutely irresistible! Perfect for parties, holidays, or an anytime treat.
Ingredients
- 1 can (16 oz) refrigerated biscuit dough or puff pastry
- 1 cup cherry pie filling
- 2 tbsp melted butter
- 2 tbsp granulated sugar (optional, for sprinkling)
- 1 tsp ground cinnamon (optional)
- Powdered sugar, for dusting
- Oil (if frying)
Instructions
Preheat the oven to 375°F (190°C) or set your air fryer to 350°F (175°C).
Prepare the dough: Flatten each biscuit or pastry piece slightly.
Add the filling: Spoon 1 teaspoon of cherry pie filling into the center of each piece.
Seal the dough: Fold and pinch the edges together, forming a ball.
Butter and sugar: Brush melted butter on top and sprinkle with sugar-cinnamon mixture.
Bake or fry:
Oven: Bake 10–12 minutes or until golden brown.
Air fryer: Cook 8 minutes, flipping halfway through.
Frying: Fry in hot oil for 2–3 minutes per side.
Cool and serve: Dust with powdered sugar and enjoy warm!
Notes
- Don’t overfill the dough; a teaspoon of filling is perfect to prevent leaks.
- Seal edges tightly to avoid cherry filling oozing out during baking.
- For an extra crunch, sprinkle coarse sugar before baking.
- Want variety? Swap cherry for blueberry, apple, or peach filling!
- Serve warm for the ultimate gooey, pie-like experience.
- Prep Time: 10 minutes
- Cook Time: 12 minutes