
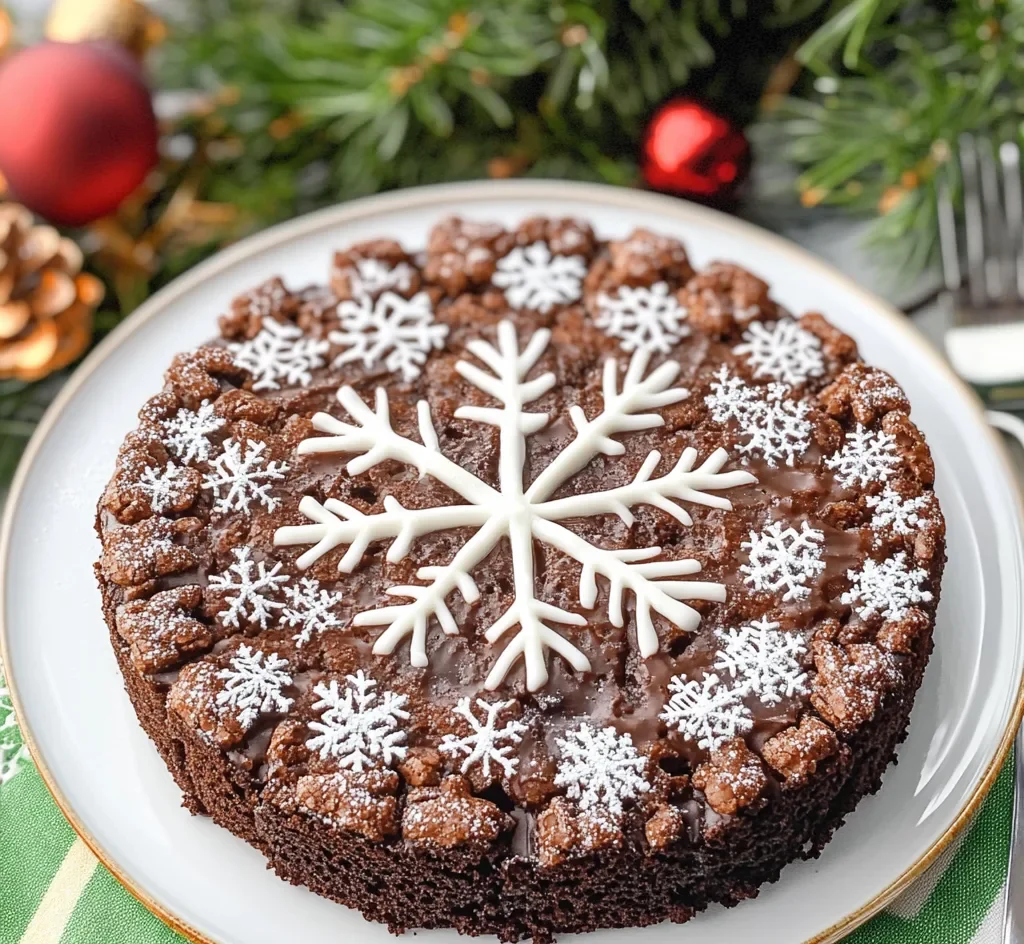
There’s something truly magical about winter desserts, and nothing captures the holiday spirit quite like a Snowflake Brownie Cake. Imagine a rich, fudgy brownie base that’s moist on the inside, slightly crisp on the edges, and beautifully dusted with powdered sugar to resemble freshly fallen snow. It’s a dessert that’s both simple and elegant — perfect for Christmas parties, winter gatherings, or cozy evenings by the fireplace.
Why You’ll Love This Recipe
You’re going to fall in love with this Snowflake Brownie Cake for so many reasons:
- Fudgy and Moist: Each bite melts in your mouth with rich chocolate flavor.
- Festive and Beautiful: The powdered sugar topping gives it that stunning snowflake effect.
- Easy to Make: Simple ingredients, straightforward steps — no fancy equipment required.
- Perfect for Any Occasion: Ideal for Christmas, winter birthdays, or even as a make-ahead dessert.
- Customizable: You can add nuts, chocolate chips, or even peppermint for a holiday twist.
If you adore brownies and chocolate cakes, this recipe gives you the best of both worlds — rich, dense, and utterly decadent. It’s a showstopper on any dessert table!
Ingredients You’ll Need
Here’s what you’ll need to make this gorgeous Snowflake Brownie Cake:
- Butter: 1 cup (melted and slightly cooled)
- Granulated Sugar: 1 ½ cups
- Brown Sugar: ½ cup (adds a caramel-like richness)
- Eggs: 4 large
- Vanilla Extract: 2 teaspoons
- All-Purpose Flour: 1 cup
- Unsweetened Cocoa Powder: ¾ cup
- Salt: ½ teaspoon
- Baking Powder: ½ teaspoon
- Semi-Sweet Chocolate Chips: 1 cup (optional but highly recommended)
- Powdered Sugar: For dusting on top
💡 Tip: You’ll find the full list of ingredients and measurements in the recipe card below. For an extra chocolatey flavor, use high-quality cocoa powder and real butter — it makes all the difference!
Let’s Get Started
Ready to bake? Follow these simple steps to create your Snowflake Brownie Cake masterpiece:
- Preheat Your Oven:
Set your oven to 350°F (175°C). Grease a round or square 9-inch cake pan and line the bottom with parchment paper for easy removal. - Mix Wet Ingredients:
In a large mixing bowl, whisk together the melted butter, granulated sugar, and brown sugar until well combined. Add the eggs one at a time, whisking after each addition. Stir in the vanilla extract. - Combine Dry Ingredients:
In a separate bowl, sift together the flour, cocoa powder, salt, and baking powder. - Combine Wet and Dry:
Gradually fold the dry mixture into the wet ingredients using a spatula. Stir just until combined — don’t overmix or your brownies may turn cakey instead of fudgy. - Add Chocolate Chips:
Fold in the chocolate chips for that extra gooey texture. - Bake:
Pour the batter into the prepared pan and smooth the top with a spatula. Bake for 25–30 minutes, or until a toothpick inserted into the center comes out with a few moist crumbs (not completely clean). - Cool and Decorate:
Let the cake cool completely in the pan before removing it. Once cooled, dust generously with powdered sugar. For a festive snowflake design, place a paper snowflake stencil over the cake before sifting the sugar, then carefully remove the stencil to reveal your design.
And there you have it — a beautiful Snowflake Brownie Cake that looks as amazing as it tastes!
Servings and Pairing
This recipe serves 8–10 people, depending on how generous you slice it. It’s perfect for parties, potlucks, or cozy family nights.
Pairing Suggestions:
- With Ice Cream: A scoop of vanilla or peppermint ice cream takes it to the next level.
- With Hot Chocolate: The ultimate winter pairing!
- With Coffee or Espresso: The deep cocoa flavor perfectly complements a strong brew.
- With Fresh Berries: Add a burst of freshness and color to your dessert plate.
This cake is versatile enough to serve warm for a gooey treat or chilled for a denser, more truffle-like texture.
Variations
Want to get creative? Here are some delicious twists on the classic recipe:
- Peppermint Brownie Cake: Add ½ teaspoon peppermint extract and sprinkle crushed candy canes on top.
- Nutty Delight: Fold in chopped walnuts or pecans for added crunch.
- Mocha Brownie Cake: Mix in a tablespoon of instant espresso powder for a coffee-infused flavor.
- Salted Caramel Swirl: Drizzle caramel sauce over the batter before baking and swirl lightly.
- Gluten-Free Version: Substitute all-purpose flour with a 1:1 gluten-free flour blend.
Each variation adds its own flair, making this dessert endlessly adaptable to your mood or the season.
Storage Tips
To keep your Snowflake Brownie Cake fresh and fudgy:
- Room Temperature: Store in an airtight container for up to 3 days.
- Refrigerator: Lasts up to 1 week when chilled. Bring to room temperature before serving for the best texture.
- Freezer: Wrap individual slices in plastic wrap and freeze for up to 3 months. Thaw overnight in the fridge.
Pro Tip: For that just-baked gooeyness, microwave a slice for 10–15 seconds before serving.
FAQs
Can I use a boxed brownie mix for this recipe?
Yes, you can! Just prepare according to the package and bake in a round pan, then dust with powdered sugar for that snowflake look.
How do I make the snowflake pattern?
Use a paper snowflake stencil or cut your own from parchment paper. Place it on top of the cooled cake and sift powdered sugar over it, then lift carefully.
Can I make it ahead of time?
Absolutely. Bake a day ahead, cool completely, and store covered. Dust with sugar right before serving.
What type of cocoa powder works best?
Unsweetened Dutch-processed cocoa powder gives a deep, rich flavor and darker color.
How do I keep my brownie cake fudgy, not cakey?
Avoid overbaking and overmixing. Stop baking when the center is just set and slightly gooey.
Final Thoughts
The Snowflake Brownie Cake isn’t just a dessert — it’s a winter celebration on a plate. With its decadent chocolate flavor, soft texture, and elegant powdered sugar finish, it’s guaranteed to impress at any gathering.
Print
Snowflake Brownie Cake
- Total Time: 45 minutes
- Yield: 8 servings
- Diet: Vegetarian
Description
This Snowflake Brownie Cake is rich, fudgy, and dusted with powdered sugar to resemble delicate snowflakes. A perfect holiday dessert that’s easy, festive, and irresistibly chocolatey!
Ingredients
- 1 cup unsalted butter (melted and slightly cooled)
- 1 ½ cups granulated sugar
- ½ cup brown sugar
- 4 large eggs
- 2 teaspoons vanilla extract
- 1 cup all-purpose flour
- ¾ cup unsweetened cocoa powder
- ½ teaspoon salt
- ½ teaspoon baking powder
- 1 cup semi-sweet chocolate chips (optional)
- Powdered sugar (for dusting)
Instructions
- Preheat Oven: Set your oven to 350°F (175°C). Grease a 9-inch round or square cake pan and line it with parchment paper.
- Mix Wet Ingredients: In a bowl, whisk together melted butter, granulated sugar, and brown sugar. Add eggs one by one, whisking after each addition. Stir in vanilla extract.
- Combine Dry Ingredients: In another bowl, sift flour, cocoa powder, salt, and baking powder.
- Mix Together: Gradually fold the dry ingredients into the wet mixture. Stir gently until combined — don’t overmix.
- Add Chocolate Chips: Fold in chocolate chips for extra gooeyness.
- Bake: Pour the batter into the pan and smooth the top. Bake for 25–30 minutes, or until a toothpick inserted in the center comes out with a few moist crumbs.
- Cool & Decorate: Let the cake cool completely. Dust generously with powdered sugar using a snowflake stencil for a festive design.
Notes
- Don’t Overmix: Stir the batter just until combined to keep it fudgy, not cakey.
- Check Early: Start checking at 25 minutes — brownies continue to cook after being removed from the oven.
- Use Quality Cocoa: The better the cocoa, the richer the flavor.
- Snowflake Design: Make or print a paper snowflake stencil to achieve a perfect snowy pattern.
- Serve Warm: Reheat slices slightly for that fresh-from-the-oven gooey texture.
- Prep Time: 15 minutes
- Cook Time: 30 minutes